 Save to Pinterest
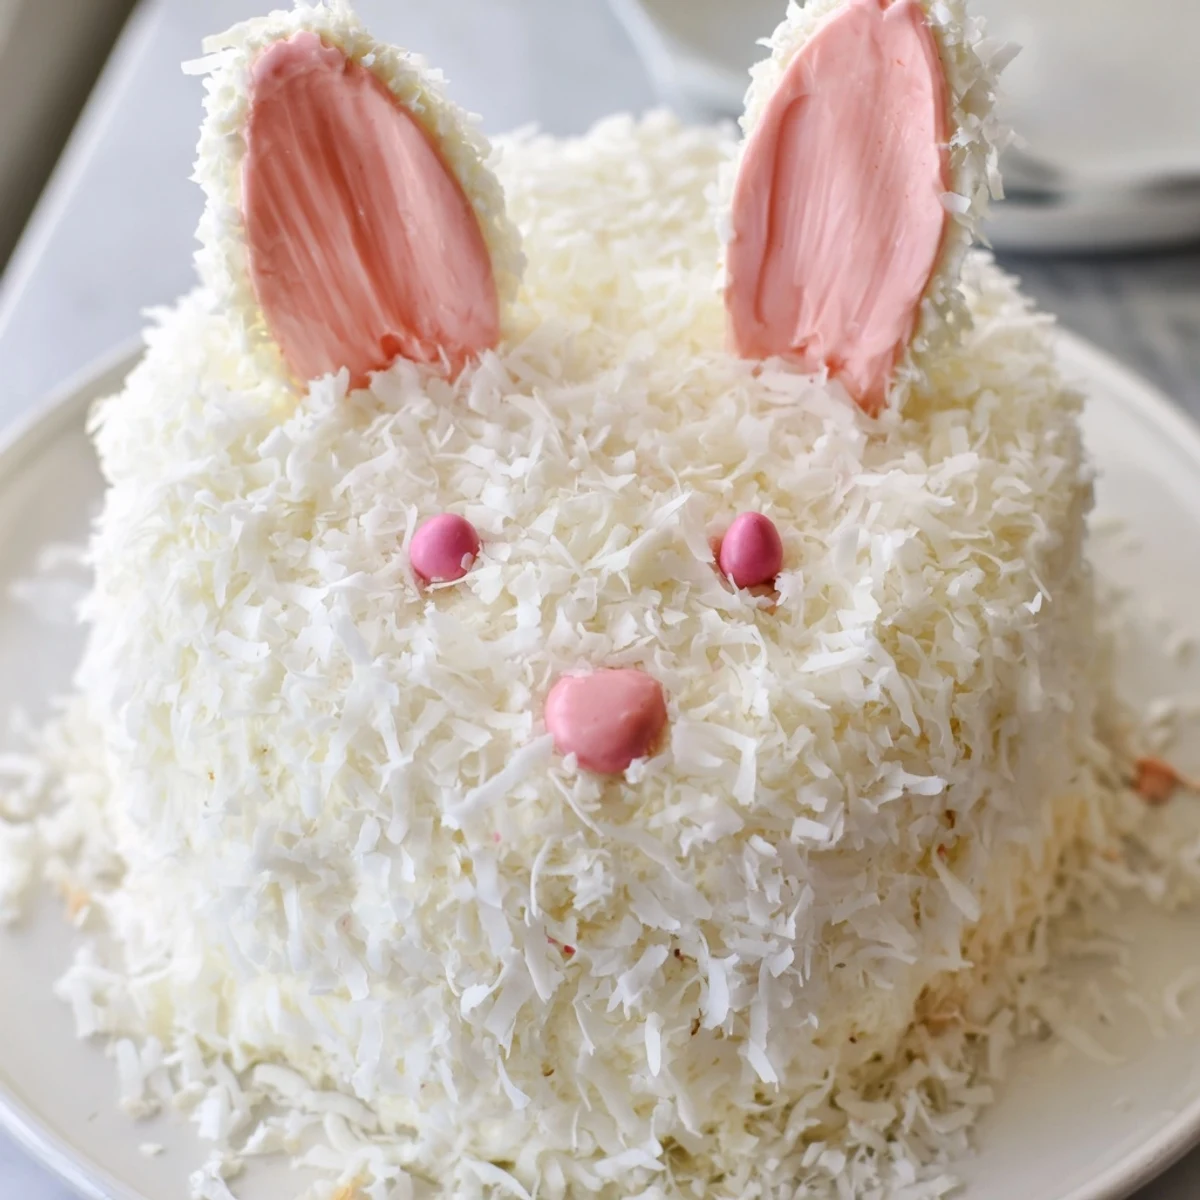
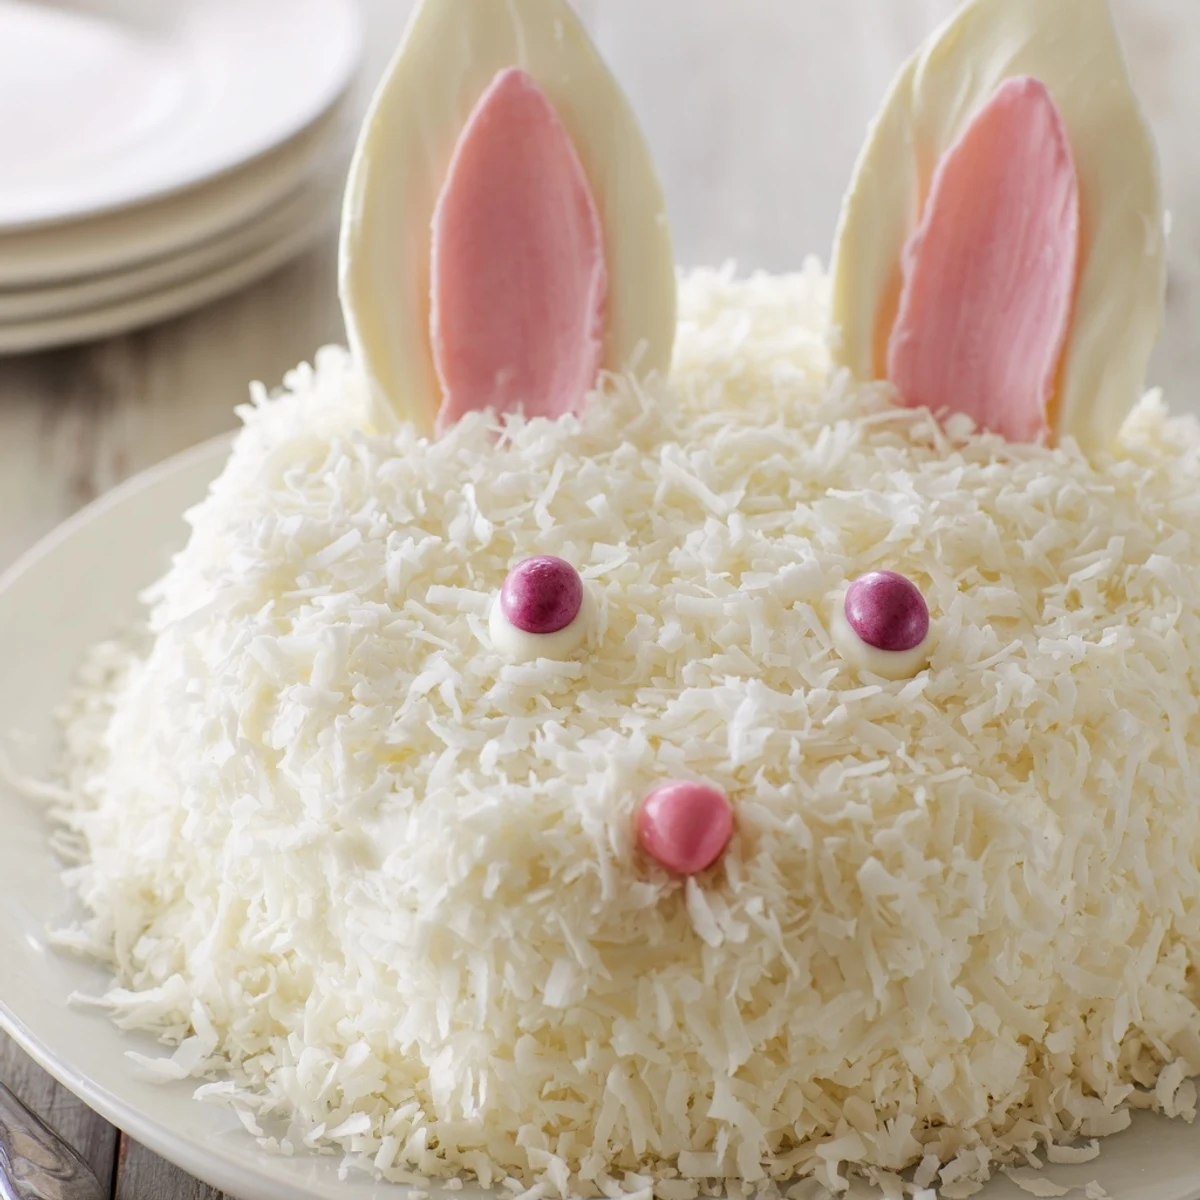
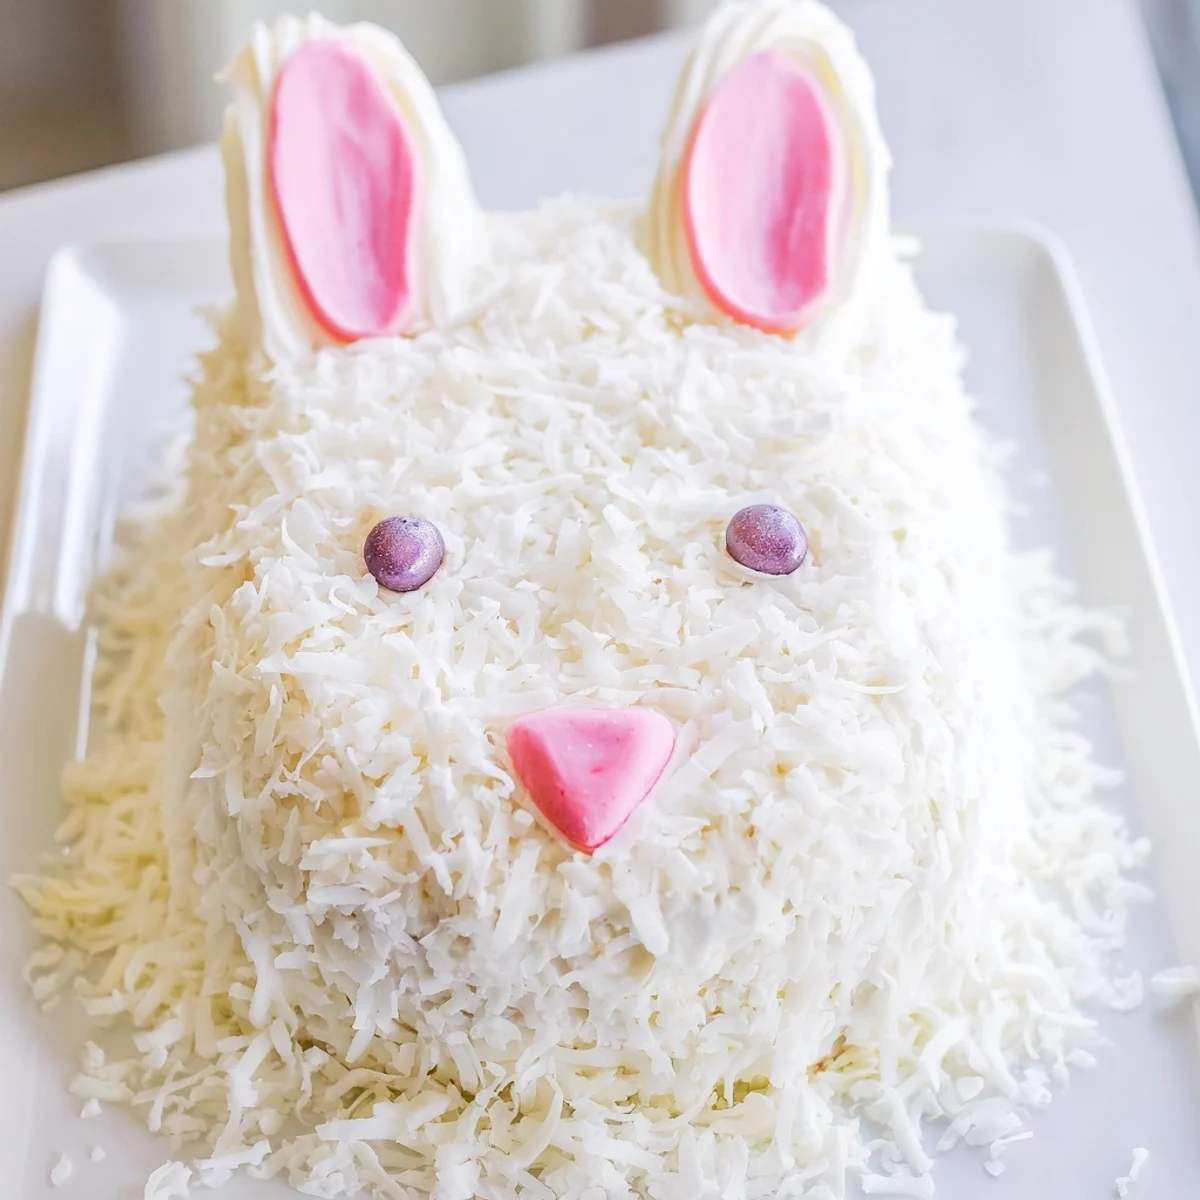
 This delightful bunny-shaped creation brings whimsy to any spring table. Start with two moist vanilla rounds, then transform them into an adorable face with floppy ears and a bow tie. The cake gets coated in creamy buttercream and rolled in shredded coconut for that perfect fluffy fur texture. Pink-tinted coconut adds sweet inner ear details, while simple candies bring the bunny's face to life. The entire process takes just over an hour from mixing bowl to serving platter, making it manageable for bakers of any skill level.
The kitchen counter was covered in coconut flakes, my daughter was bouncing on her toes, and I had somehow agreed to make a bunny cake for her first grade class party. I had no grand plan, just a vague memory of seeing something similar in a magazine years ago, but her excitement made me dive right in anyway.
My first attempt looked more like a lopsided rabbit than the elegant Easter centerpiece I had envisioned, but the kids did not care one bit. They were too busy grabbing at the jellybean nose and fighting over who got the piece with the bow tie, which taught me that charm matters more than perfection.
Ingredients
- All-purpose flour: The foundation of any tender cake, providing structure while keeping crumbs soft and delicate
- Baking powder and baking soda: Both leavening agents work together to give the cake its rise and light texture
- Salt: Enhances sweetness and balances flavors, never skip this small but mighty ingredient
- Granulated sugar: Sweetens the cake while creating a tender crumb and helping with moisture retention
- Unsalted butter: Room temperature butter creates air pockets when creamed, resulting in a lighter texture
- Large eggs: Bind ingredients together and add richness, always use room temperature eggs for better emulsification
- Whole milk: Adds moisture and fat for a tender crumb, warm milk mixes more easily into batter
- Vanilla extract: Pure vanilla extract makes all the difference in flavor, never skimp on this
- Unsalted butter for frosting: Softened to room temperature creates the smoothest, most spreadable buttercream
- Powdered sugar: Sifting prevents lumps and ensures silky smooth frosting every single time
- Milk for frosting: Adjusts consistency to your preference, starting with less and adding more as needed
- Shredded sweetened coconut: Creates that fluffy fur appearance while adding delightful texture and flavor
- Pink food coloring: A tiny drop transforms plain coconut into the perfect inner ear color
- Jelly beans or mini candies: These become the expressive eyes and nose that bring your bunny to life
- Pink and white fondant or marshmallows: Shape these into ears that stand tall and complete the bunny look
Instructions
- Prepare your oven and pans:
- Preheat oven to 350°F and grease two 8-inch round pans with butter, then dust with flour for easy release later
- Whisk the dry ingredients:
- Combine flour, baking powder, baking soda, and salt in a medium bowl, whisking to distribute leavening evenly
- Cream butter and sugar:
- Beat softened butter and granulated sugar until pale and fluffy, about 3 to 5 minutes, creating tiny air pockets
- Add eggs and vanilla:
- Beat in eggs one at a time, fully incorporating each before adding the next, then mix in vanilla extract
- Combine wet and dry:
- Alternate adding flour mixture and milk, starting and ending with flour, mixing just until combined to avoid tough cake
- Bake the cakes:
- Divide batter evenly between pans and bake 22 to 25 minutes until a toothpick comes out clean
- Cool completely:
- Let cakes rest in pans 10 minutes, then turn onto wire racks until completely cool to the touch
- Make buttercream frosting:
- Beat butter until smooth, gradually add powdered sugar, vanilla, salt, and enough milk for spreadable consistency
- Shape the bunny pieces:
- Keep one cake whole for the face, cut second cake into two ovals for ears and shape remaining center into a bow tie
- Arrange on serving tray:
- Position face piece with ears above and bow tie below, leaving small gaps between pieces for frosting
- Apply crumb coat:
- Spread thin layer of frosting over all pieces, sealing in crumbs, then chill 20 minutes until firm
- Add fur texture:
- Frost cake completely with remaining buttercream, then press shredded coconut generously over entire surface
- Create pink inner ears:
- Tint small amount of coconut with pink food coloring, gently press colored coconut onto ear sections
- Finish with features:
- Use fondant or marshmallows for ear details, place candies for eyes, nose, and whiskers as desired
 Save to Pinterest
 Years later, my daughter still requests this cake every spring, though now she helps with the decorating and usually ends up with coconut in her hair. It has become one of those recipes that is not really about the cake itself but about the laughter and mess that comes with making it together.
Making It Your Own
Swap coconut for chopped nuts or sprinkles if texture preference differs, though nothing quite replicates that fluffy fur appearance. Chocolate cake works beautifully with coconut, creating an Easter bunny that looks like a chocolate dandelion.
Storage and Timing
Bake cakes up to two days ahead, wrap tightly in plastic, and store at room temperature until ready to assemble and decorate. The fully finished cake stays fresh covered at room temperature for two days, though refrigeration extends this to four days if needed.
Serving Suggestions
Cut the bunny face first, as everyone wants a piece with the candy features. Serve with sparkling lemonade for a spring brunch or pair with lightly sweet Moscato for an adult Easter gathering.
- Use licorice strings pulled apart for whimsical whiskers that actually look realistic
- Set up a decorating station and let guests add their own candy features
- Make extra bow tie pieces from the second cake if serving a larger crowd
 Save to Pinterest
 This bunny cake has become the centerpiece of our spring celebrations, a whimsical dessert that brings out the inner child in everyone who sees it.
Recipe FAQs
- → How do I cut the cake into bunny shapes?
-
Leave one 8-inch round whole for the bunny's face. Cut the second round into two equal ovals for ears and shape the remaining center into a bow tie. Arrange all pieces on a large serving tray before frosting.
- → Can I make this cake ahead of time?
-
Bake the cakes up to 2 days in advance and store wrapped at room temperature. The assembled bunny cake keeps covered at room temperature for 2 days or refrigerated for up to 4 days.
- → What if I don't have fondant for the ears?
-
Marshmallows work beautifully as ear details. You can also use pink candy melts, colored white chocolate, or simply tint shredded coconut with pink food coloring for the inner ear sections.
- → Can I use chocolate cake instead?
-
Absolutely. Chocolate cake pairs wonderfully with coconut and creates a striking contrast. Use your favorite chocolate cake recipe or mix, keeping the same pan size and baking time.
- → How much coconut do I need for full coverage?
-
Two cups of shredded sweetened coconut provides ample coverage for the entire bunny shape. Tint a small handful with pink food coloring separately for the inner ear details.
- → What's the best way to apply the coconut?
-
Frost the cake completely with buttercream first, then gently press handfuls of coconut onto the surface. Work in sections and pat lightly to help the coconut adhere evenly across the entire bunny shape.
