 Save to Pinterest
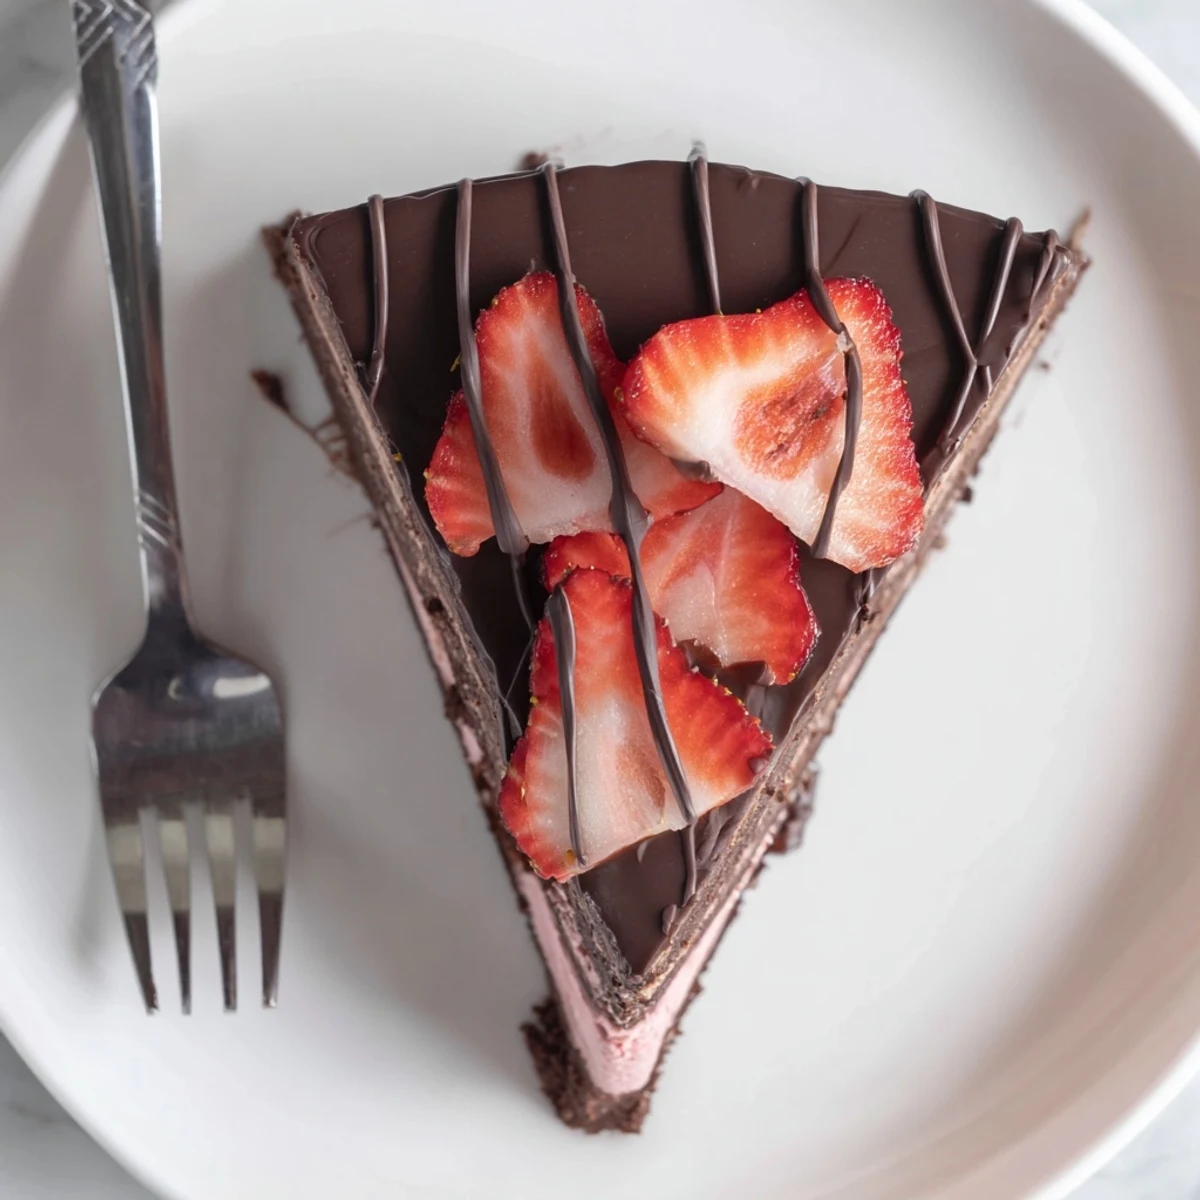
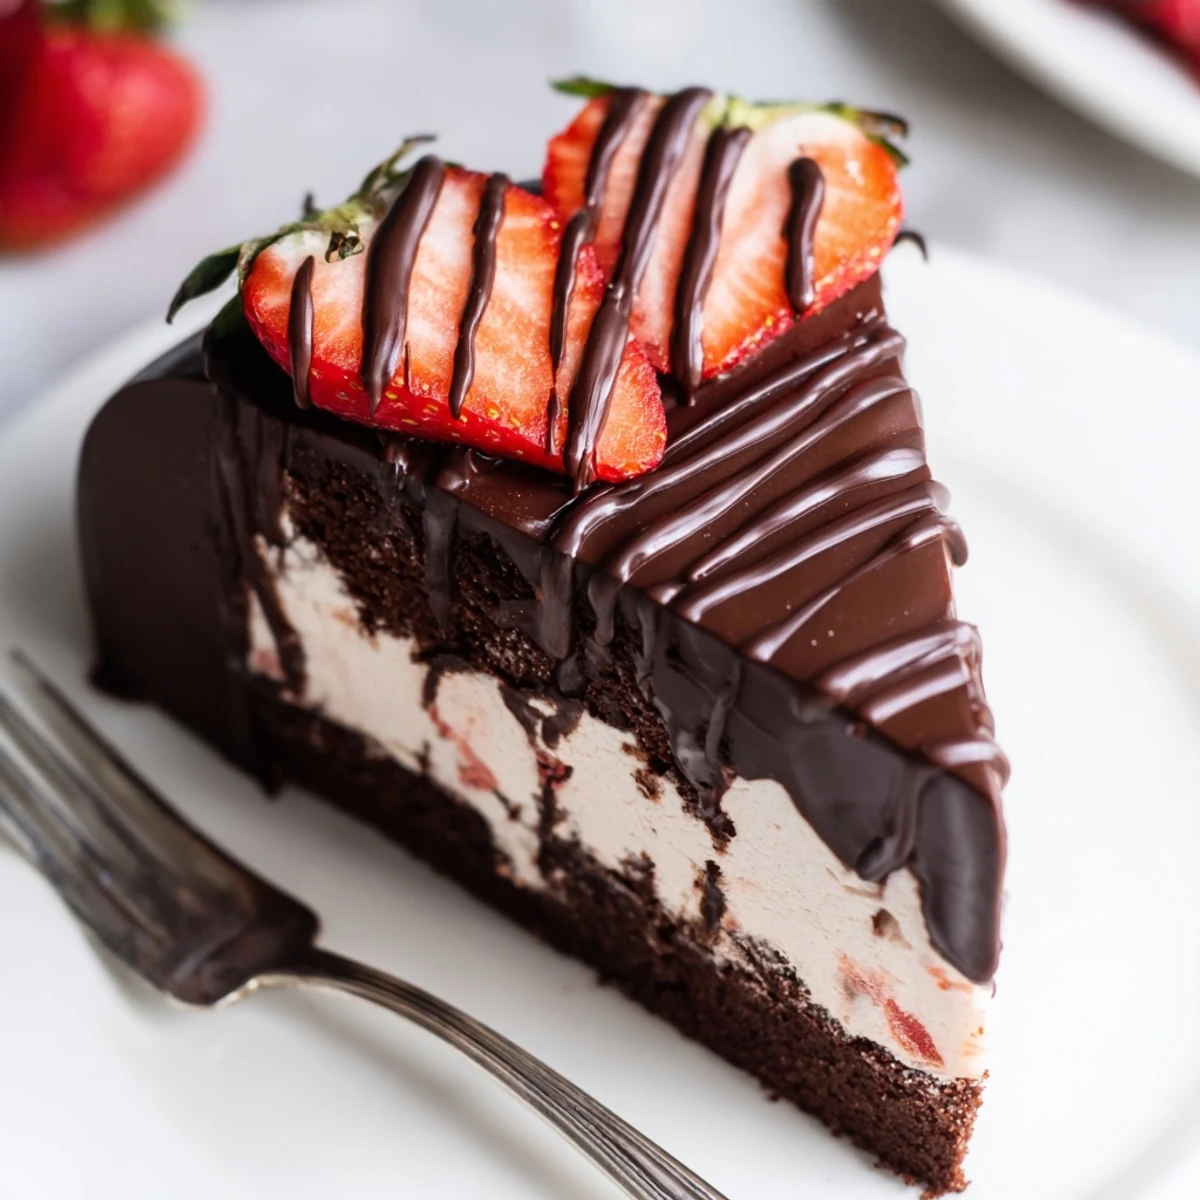
 This indulgent frozen dessert combines three beloved elements: a tender chocolate cake base, a thick layer of creamy strawberry ice cream, and a crackling chocolate shell that creates the perfect textural contrast. The assembly requires some freezing time but comes together with simple techniques you likely already have in your kitchen.
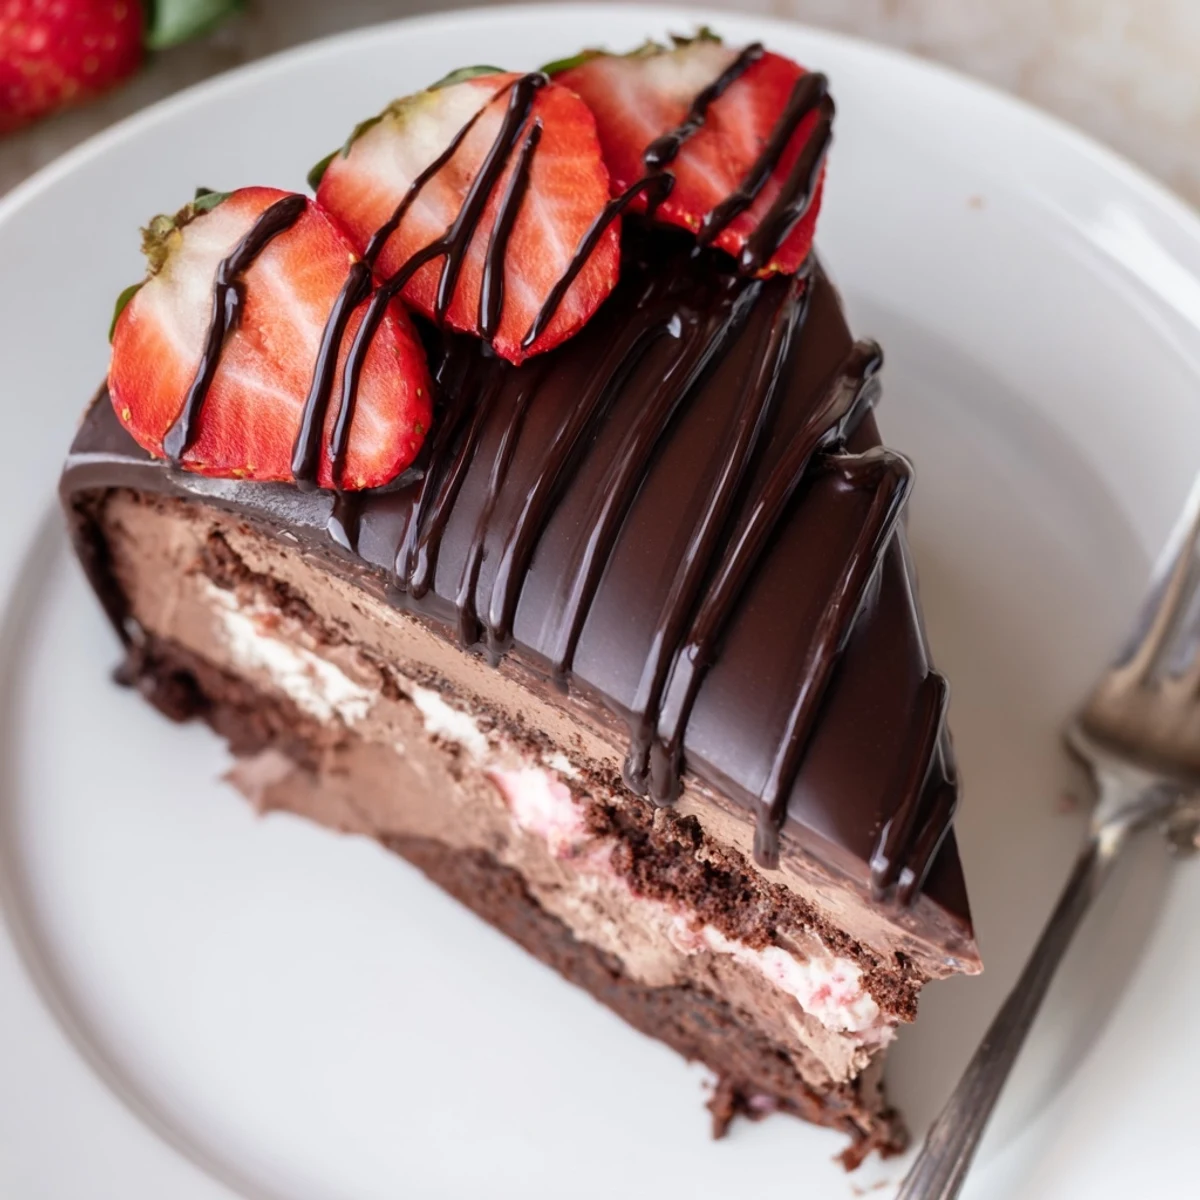
The result is a showstopping centerpiece that tastes even better than it looks. The chocolate cake stays moist beneath the ice cream, while the magic shell topping provides that satisfying snap when you slice into it. Fresh strawberry garnish adds bright color and a burst of fruitiness that balances the rich chocolate layers.
Perfect for birthdays, summer barbecues, or whenever you want to serve something memorable. The cake can be assembled ahead and kept in the freezer, making it ideal for entertaining.
My youngest daughter requested this cake for her summer birthday last year, and the look on her face when I brought it out still makes me smile. She had seen something similar in a magazine and begged me to recreate it, convinced it was the most impressive dessert in the world. That first attempt taught me so much about patience and timing, but seeing her friends gather around the table, eyes wide as I sliced through the chocolate shell to reveal the strawberry layers, was absolutely worth every frozen minute. Now it has become our go-to celebration dessert, requested for everything from graduations to impromptu Tuesday night treats.
Last summer I made six of these cakes for various neighborhood gatherings, each time learning something new about the process. My neighbor Sarah swears the secret is in the chocolate shell temperature, while another friend insists on letting the ice cream sit out for exactly seven minutes before spreading. I have learned that following my own rhythm works best, and now I can assemble this beauty almost by feel, watching the chocolate coating ripple into that perfect glossy finish. There is something deeply satisfying about pulling a fully completed dessert from the freezer, knowing it is ready to make someone is day just a little sweeter.
Ingredients
- 1 cup (125 g) all-purpose flour: The foundation of our chocolate cake layer, providing structure without being too dense or heavy
- 1/3 cup (30 g) unsweetened cocoa powder: I have learned that sifting this first prevents any lumps and ensures a smooth, rich chocolate flavor throughout the cake
- 1 tsp baking powder: Essential for that perfect rise in the oven, giving the cake layer just enough lift to support the ice cream above
- 1/2 tsp baking soda: Works with the baking powder to create that tender crumb texture you want in a dessert cake
- 1/4 tsp salt: Do not skip this, it brightens the chocolate flavor and balances all the sweetness from the ice cream and shell
- 1/2 cup (115 g) unsalted butter, softened: Room temperature butter creates the perfect fluffy base for the cake layer
- 1 cup (200 g) granulated sugar: Sweetens the cake while also helping create that tender texture we all love
- 2 large eggs: Room temperature eggs incorporate better and help create structure in the cake layer
- 1 tsp vanilla extract: Pure vanilla makes such a difference here, amplifying the chocolate flavor beautifully
- 1/2 cup (120 ml) whole milk: Adds moisture and helps create a tender, not dry, cake base
- 1.5 quarts (1.4 L) strawberry ice cream, slightly softened: The star of our show, softened just enough to spread smoothly without melting completely
- 2 cups (340 g) semi-sweet chocolate chips: Quality chocolate makes all the difference in the shell, so use the best you can find
- 1/4 cup (60 ml) coconut oil: Creates that signature crisp snap when you cut through the chocolate shell
- 10-12 fresh strawberries, hulled and halved: Fresh berries on top are not just pretty, they add a bright, juicy contrast to all the rich chocolate
- 2 oz (55 g) dark chocolate, melted: The optional drizzle adds sophistication and makes the cake look bakery beautiful
Instructions
- Preheat and prepare your pan:
- Set your oven to 350 degrees and thoroughly grease a 9 inch springform pan, lining the bottom with parchment paper for easy removal later
- Whisk the dry ingredients:
- In a medium bowl, combine flour, cocoa powder, baking powder, baking soda, and salt until everything is evenly distributed
- Cream the butter and sugar:
- Beat softened butter and sugar in a large bowl until the mixture turns pale and fluffy, about 3 to 4 minutes
- Add the eggs and vanilla:
- Add eggs one at a time, beating well after each addition, then mix in the vanilla extract until fully incorporated
- Combine wet and dry ingredients:
- Alternate adding the dry mixture and milk to the butter mixture, beginning and ending with the dry ingredients, mixing until just combined
- Bake the cake layer:
- Pour batter into your prepared pan, smooth the top, and bake for 22 to 25 minutes until a toothpick comes out clean, then cool completely in the pan
- Layer the ice cream:
- Once the cake is completely cool, spread the softened strawberry ice cream evenly over the top and freeze for at least 3 to 4 hours until firm
- Make the chocolate shell:
- Melt chocolate chips and coconut oil together in 30 second intervals, stirring until completely smooth, then let cool slightly
- Apply the chocolate coating:
- Remove the cake from the freezer, release it from the springform pan, place on a serving plate, and pour the chocolate shell over the top, spreading quickly
- Finish and freeze:
- Garnish with fresh strawberry halves and optional dark chocolate drizzle, then return to the freezer for 30 minutes to set the shell completely
 Save to Pinterest
 There was a moment during my sister is engagement party when the power flickered and went out, and we all stood in the dim light laughing about whether the ice cream cake would survive. We lit candles and served dessert anyway, and something about eating this frozen beauty by candlelight made it feel even more special and magical. That night taught me that the best celebrations are not about perfection, but about gathering together with people you love, sharing something sweet, and making memories that stick long after the last crumb is gone.
Timing Is Everything
I have found that making the cake layer the night before and keeping it well wrapped in the refrigerator works beautifully. This means you are not rushing around on the day you want to serve it, and the cake has time to develop an even better texture. The ice cream layer goes on more smoothly when the cake is completely cold, and the chocolate shell sets faster too. Breaking this process into stages removes all the stress and lets you enjoy the creating part much more.
Working with Ice Cream
Finding that perfect softness for spreading the ice cream took me several tries to master. Too frozen and it tears the cake layer, too melted and it makes everything soggy. I set the ice cream on the counter for 10 to 15 minutes while I finish other tasks, checking it every few minutes. You want it to be the consistency of soft serve ice cream, spreadable but still holding its shape well. This small attention to detail makes such a difference in the final appearance and texture of your cake.
The Chocolate Shell Secret
After many experiments with different ratios and temperatures, I have discovered that the chocolate shell mixture needs to be around 85 degrees when you pour it over the frozen cake. Any warmer and it starts to melt the ice cream layer, any cooler and it does not spread into that smooth, glassy finish. I use an instant read thermometer now, but you can also tell by touching a small amount to your lip, it should feel just slightly cooler than body temperature. This one technique transformed my results from good to absolutely stunning.
 Save to Pinterest
 This cake has become my go-to for bringing people together, whether we are celebrating something big or just need a Tuesday night pick me up. There is something about that first crack through the chocolate shell that makes everyone lean in a little closer, suddenly ready for something sweet and wonderful.
Recipe FAQs
- → Can I make this ahead of time?
-
Absolutely. This dessert actually improves with a little time in the freezer. You can assemble the entire thing up to 2 weeks before serving. Just wrap it tightly in plastic wrap and foil after the chocolate shell sets. Let it sit at room temperature for about 10 minutes before slicing to get clean cuts.
- → What if I don't have a springform pan?
-
You can use a regular 9-inch cake pan lined with parchment paper, but removing it will be trickier. Try this method: freeze the assembled dessert completely, then dip the pan in warm water for about 10 seconds. Place a plate over the top and quickly invert. The frozen dessert should release cleanly.
- → Can I use different ice cream flavors?
-
Certainly. Vanilla, mint chocolate chip, or even coffee ice cream would all work beautifully with the chocolate layers. If using a harder frozen dessert like gelato, let it soften a bit more at room temperature before spreading to avoid tearing the cake.
- → Why does my chocolate shell seize sometimes?
-
This usually happens if water gets into the melting chocolate or if it's overheated. Make sure your bowl and utensils are completely dry. Microwave in 30-second intervals, stirring well each time. The coconut oil helps stabilize the mixture and gives you that signature snap when it hardens.
- → How should I store leftovers?
-
Wrap individual slices or the whole cake in plastic wrap and return to the freezer. It will keep well for up to 2 months. For best texture, let slices thaw for 5-10 minutes before eating—the chocolate shell will have softened slightly but still provide that satisfying crunch.
