 Save to Pinterest
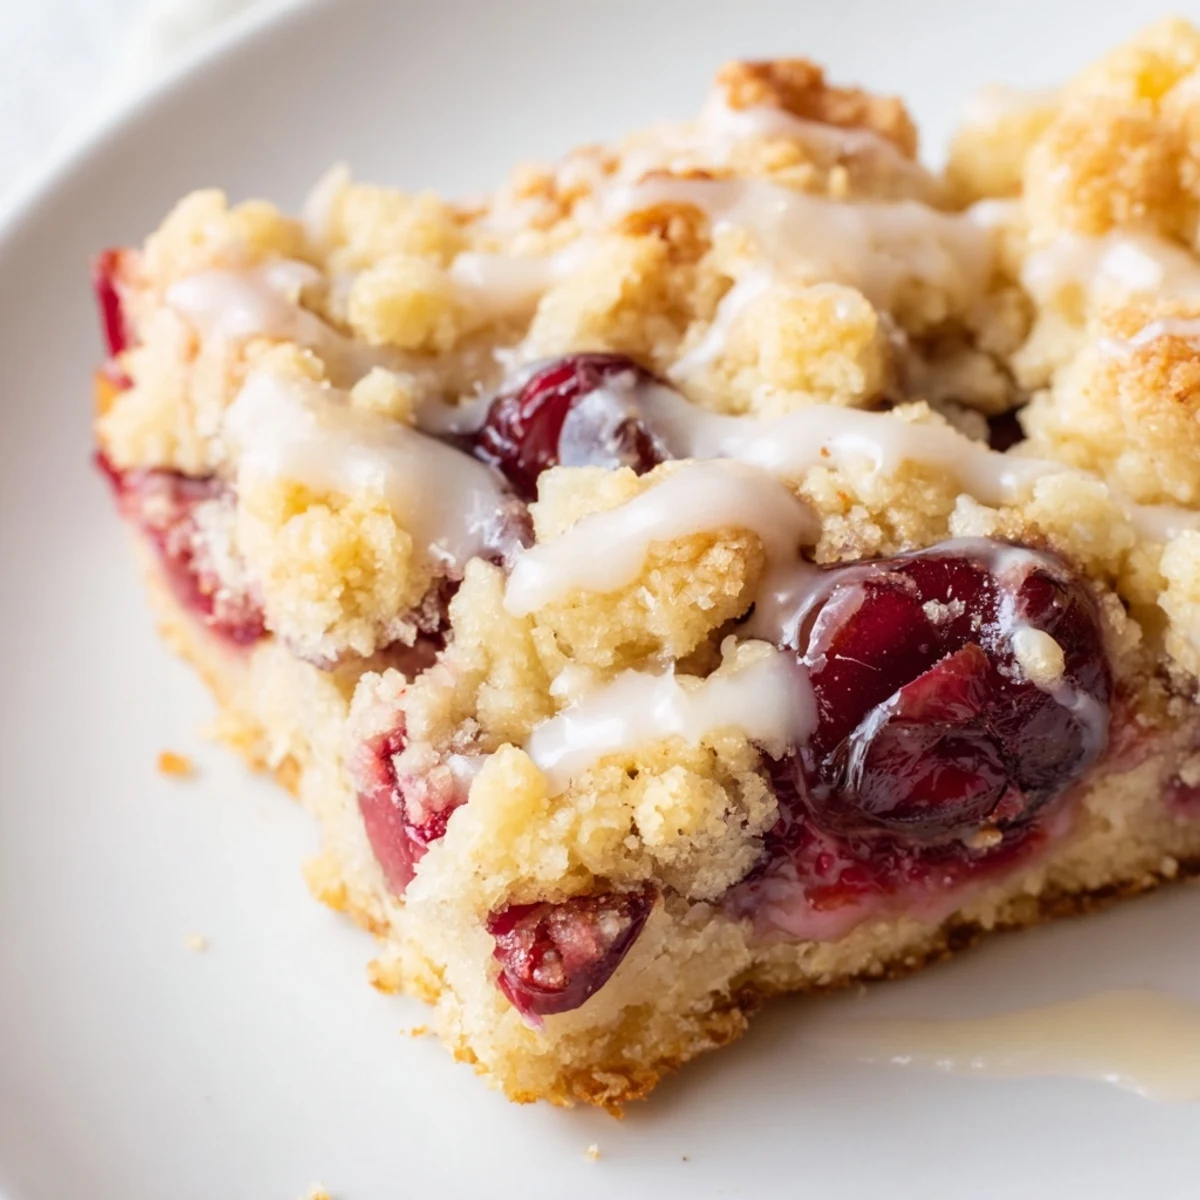
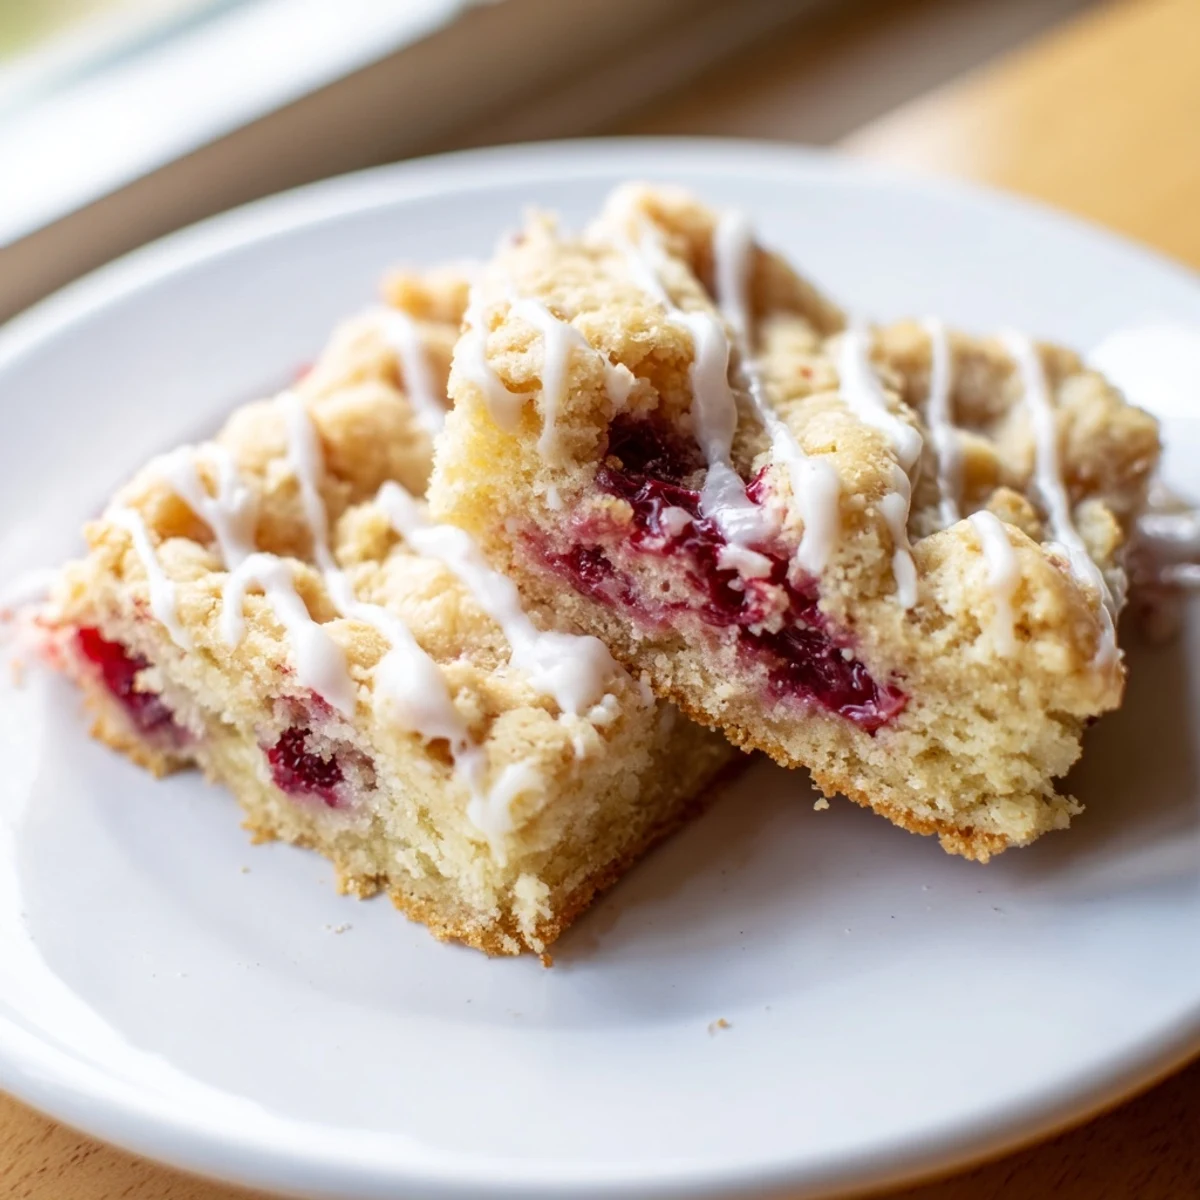
 These cherry bars feature a tender, buttery vanilla dough that bakes until golden, with a layer of sweet cherry filling peeking through. The finishing touch is a simple vanilla glaze that adds just the right amount of sweetness. Perfect for potlucks, holiday gatherings, or weeknight treats.
The dough comes together quickly by creaming butter and sugar, then adding eggs and extracts. Most of the dough forms the base, while spoonfuls are dotted over the cherry filling to create those classic crumble-topped bars.
The first time I made these cherry pie bars, my kitchen smelled like butter and nostalgia. My roommate wandered in, fork already in hand, asking what magic I was creating. They disappeared from the counter faster than I could photograph them, and I knew this recipe would become a permanent resident in my baking rotation.
I brought these to a Fourth of July barbecue last summer, and they were the first thing gone from the dessert table. My friends grandmother asked for the recipe three times during the party. Now every time I see her, she mentions those bars with a twinkle in her eye.
Ingredients
- Unsalted butter: Softened to room temperature helps create that melt in your mouth tender crumb thats impossible to resist
- Granulated sugar: Sweetens the crust while helping it bake up golden and slightly crisp at the edges
- Large eggs: Room temperature eggs incorporate better and give the dough structure without making it tough
- Vanilla extract: Pure vanilla extract makes all the difference in the buttery crust layer
- Almond extract: Just a hint enhances the cherry flavor beautifully, but vanilla works if you prefer
- All purpose flour: The foundation of the dough, creating the perfect shortbread like texture
- Salt: Balances the sweetness and makes all the flavors pop
- Cherry pie filling: One can is all you need for that luscious fruit layer that bubbles up through the crust
- Powdered sugar: Creates the silky sweet glaze that finishes these bars perfectly
- Milk: Adjust the amount to get your glaze to just the right drizzling consistency
Instructions
- Get your oven ready:
- Preheat to 350°F and grease a 9x13 inch pan or line it with parchment paper for easy removal later
- Cream the butter and sugar:
- Beat them together until fluffy and pale, about 2 to 3 minutes, to create pockets of air for tenderness
- Add the eggs and extracts:
- Beat in eggs one at a time, then stir in vanilla and almond extracts until fully incorporated
- Combine the dry ingredients:
- Whisk flour and salt in a separate bowl, then gradually mix into the wet ingredients just until combined
- Layer it up:
- Spread about two thirds of the dough in the pan, spoon cherry filling over the top, then drop small pieces of remaining dough over the cherries
- Bake until golden:
- Bake for 30 to 35 minutes until lightly golden and set at the edges, then cool completely before glazing
- Make the glaze:
- Whisk powdered sugar with milk and vanilla until smooth, then drizzle over the cooled bars and let set before slicing
 Save to Pinterest
 My daughter now requests these for her birthday instead of cake. Watching her carefully arrange the cherry filling on top has become one of my favorite baking memories. Something about sharing these moments over simple recipes feels like passing down love itself.
Making These Your Own
Swap the cherry pie filling for blueberry, apple, or even peach depending on the season. I have used homemade fruit compote in a pinch, and the results were still incredible. The almond extract can be doubled if you really love that cherry almond combination.
Storage and Make Ahead Tips
These bars actually taste better on day two as the flavors meld together. Store them in an airtight container at room temperature for up to three days. You can also freeze the unglazed bars for up to two months and glaze them after thawing.
Serving Suggestions
A warm bar with vanilla ice cream is pretty much perfection on a plate. These also travel beautifully for potlucks and picnics since they are sturdy and hold their shape well. For extra flair, sprinkle some sliced almonds over the glaze before it sets.
- Add a dollop of whipped cream alongside each bar
- Dust with extra powdered sugar just before serving for a snow capped look
- Pair with a cup of hot coffee or tea for the perfect afternoon break
 Save to Pinterest
 There is something deeply satisfying about a recipe that comes together so easily but tastes like it took all day. Hope these cherry pie bars find their way into your heart and onto your table soon.
Recipe FAQs
- → Can I use fresh cherries instead of canned filling?
-
Yes, you can use fresh cherries. Cook about 4 cups of pitted cherries with 1/2 cup sugar and 2 tablespoons cornstarch until thickened, then cool before using in place of the canned filling.
- → How should I store these cherry bars?
-
Store the bars in an airtight container at room temperature for up to 3 days. For longer storage, refrigerate for up to a week or freeze individually wrapped bars for up to 3 months.
- → Can I make the dough ahead of time?
-
Yes, you can prepare the dough up to 24 hours in advance. Wrap it tightly in plastic wrap and refrigerate. Let it soften slightly at room temperature before spreading in the pan.
- → What other fruit fillings work well?
-
Blueberry, apple, strawberry, or raspberry pie filling all work beautifully. You can also combine different fillings or use homemade fruit preserves for a more intense fruit flavor.
- → Why do I need to cool the bars completely before glazing?
-
Cooling ensures the bars are set and the glaze won't melt off. The glaze sets better on a completely cooled surface, creating that beautiful drizzled appearance without running off the edges.
- → Can I make these without a mixer?
-
Yes, you can cream the butter and sugar by hand with a sturdy wooden spoon. It will take a few minutes longer to achieve the light and fluffy texture, but the final result will be just as delicious.
