 Save to Pinterest
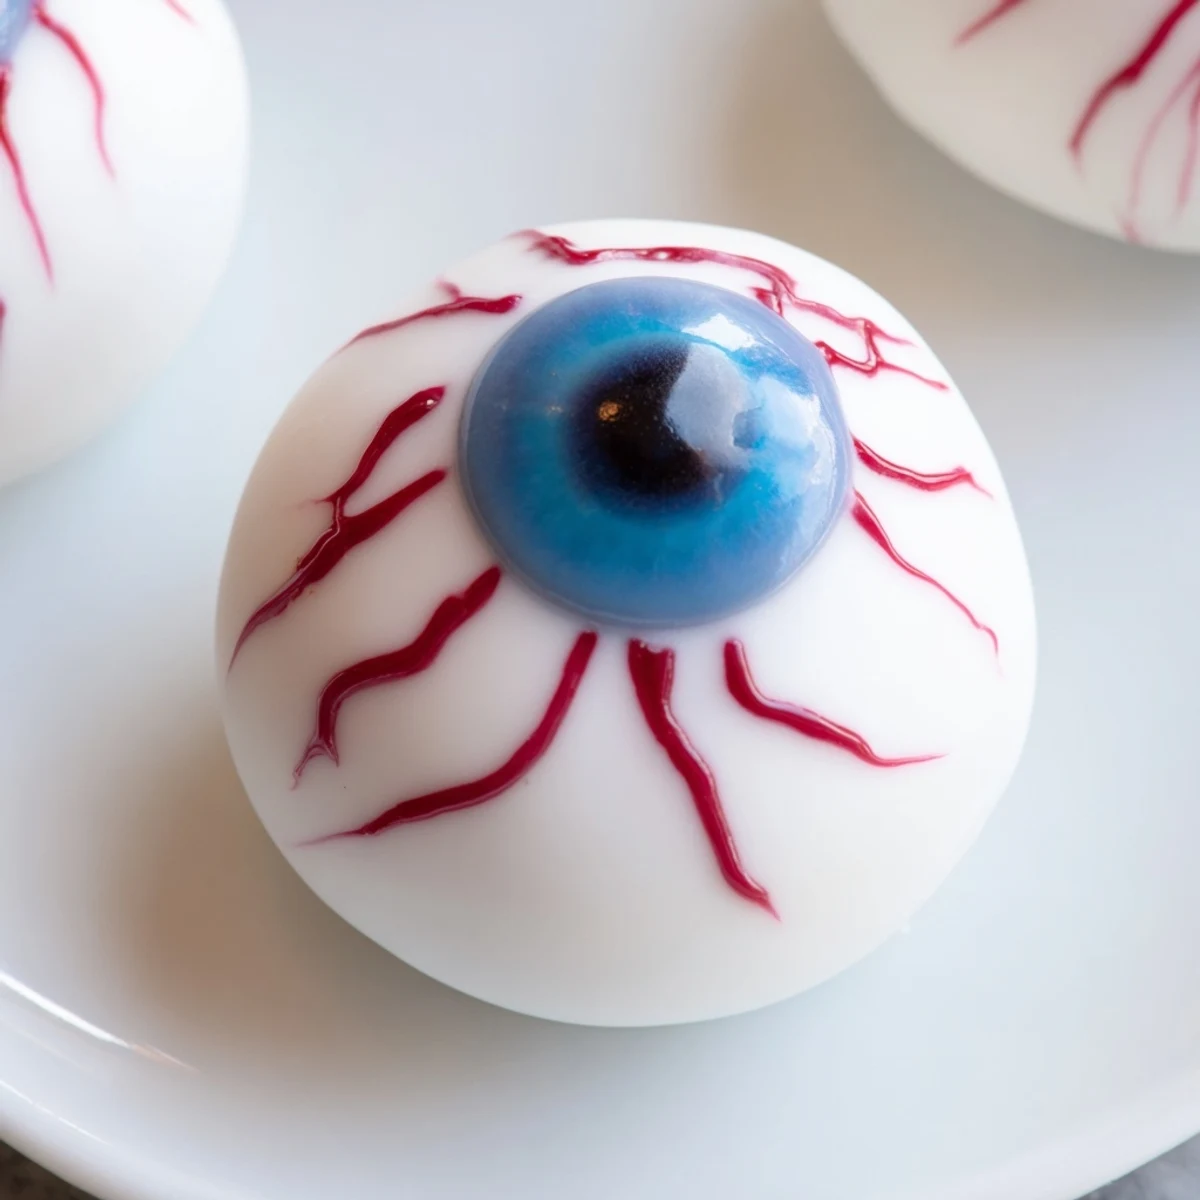
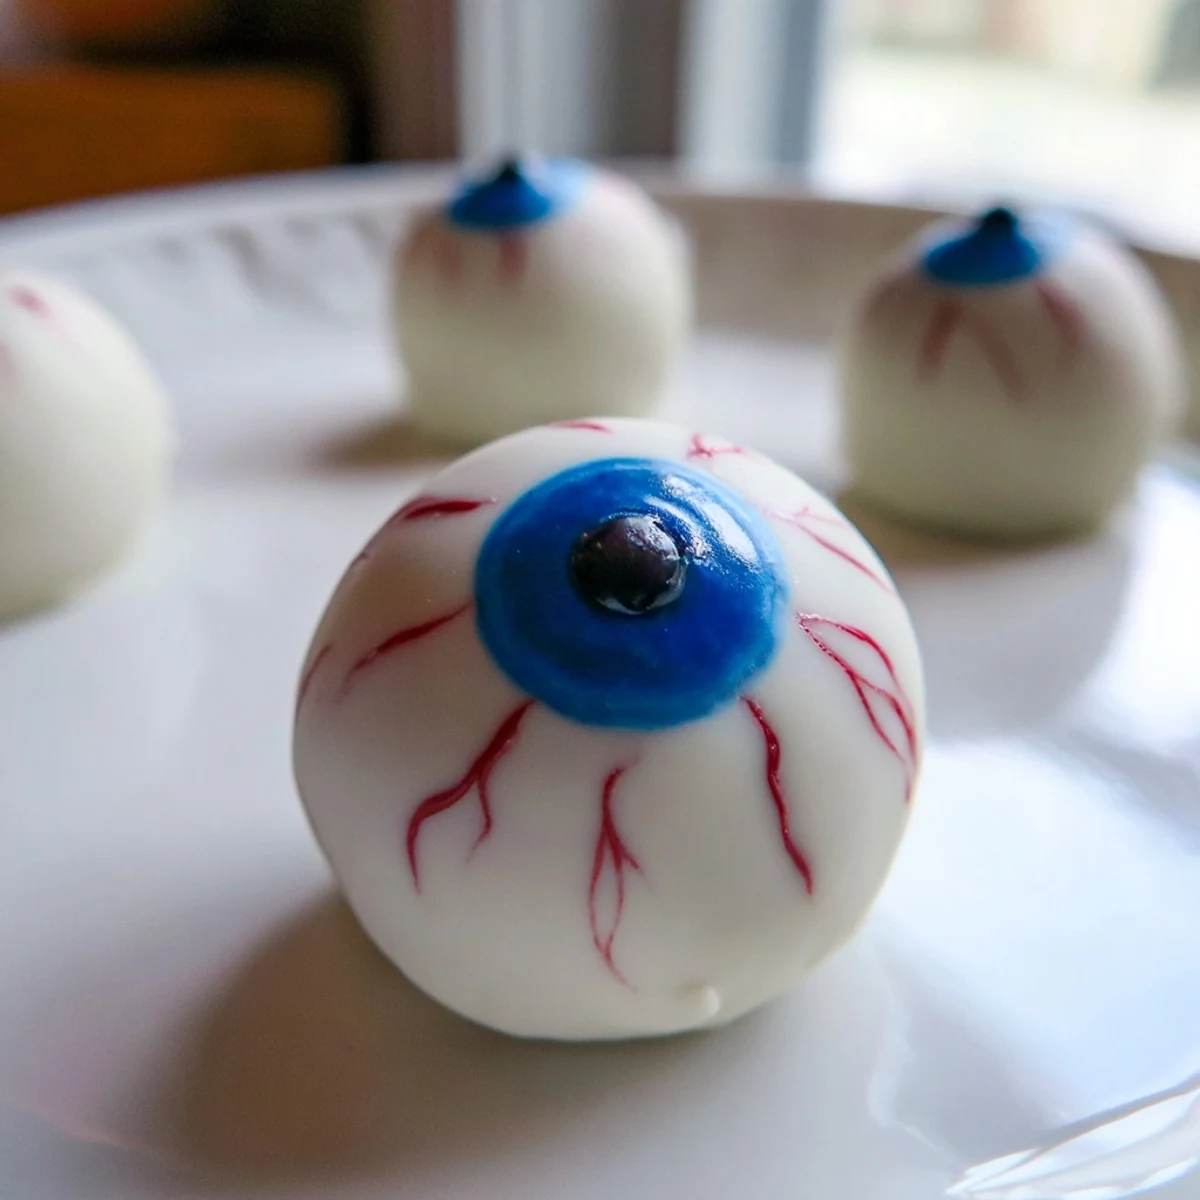
 These spooky Halloween treats combine crumbled vanilla cake with rich cream cheese frosting, hand-rolled into balls and dipped in smooth white chocolate. The creepy eyeball decoration comes from colorful candy melt irises, dark chocolate pupils, and red gel veins that make them look convincingly realistic. The moist cake interior contrasts perfectly with the crisp chocolate shell, creating an irresistible bite-sized dessert.
Make 24 eyeballs in about 75 minutes, with most time spent chilling the cake balls for easy dipping. The process is straightforward enough for beginners yet impressive enough for Halloween parties. Kids especially love helping decorate the colorful irises and drawing the spooky red veins.
The year my daughter decided she was too old for cute Halloween costumes and wanted genuinely creepy decorations instead, these eyeball cake pops became the star of the show. I was initially skeptical about making something that looked back at me from the serving platter, but there is something oddly satisfying about food that doubles as a prank.
I brought a tray to our neighborhood Halloween block party last year and watched grown men hesitate before finally giving in to curiosity. Within twenty minutes, the platter was empty and someone was already asking for the recipe for next year. The best moment was seeing our usually serious neighbor pretend the eyeball was watching him before taking a dramatic bite.
Ingredients
- Vanilla cake mix: Starting with a good base makes all the difference, whether store-bought or homemade from your favorite recipe
- Cream cheese and butter: Room temperature is non-negotiable here or you will end up with lumpy frosting that refuses to blend smoothly
- Powdered sugar: Sift it first to avoid tiny lumps in your otherwise perfect creamy mixture
- White chocolate or candy melts: Candy melts actually coat more smoothly than real white chocolate and are much more forgiving for beginners
- Dark chocolate for pupils: A tiny amount goes a long way, so save those leftover chocolate chips from other baking projects
- Colored candy melts or icing: Blue and green give the most realistic eye colors, but feel free to get creative with purple or yellow for supernatural effects
- Red gel food coloring: Gel rather than liquid gives you those nice thin veins without making the coating soggy
Instructions
- Bake and cool your cake completely:
- Warm cake will turn your frosting into a gooey mess that refuses to form proper balls, so patience at this stage saves frustration later
- Crumble the cake into fine crumbs:
- Work with your hands to break down any larger chunks until you have uniform texture throughout
- Prepare the creamy frosting:
- Beat everything together until the mixture is light and smooth with absolutely no remaining graininess from the powdered sugar
- Combine crumbs and frosting:
- Add gradually and mix by hand until the mixture holds together when you squeeze a ball in your palm
- Form and chill the eyeballs:
- Scoop evenly sized portions and roll into smooth spheres, then freeze for at least twenty minutes so they hold their shape during dipping
- Coat with white chocolate:
- Melt gently and stir frequently, then dip each ball and let excess drip off before returning to the parchment-lined tray
- Add the colored iris:
- Work quickly while the white coating is still soft, using either a piping bag or careful spoon placement for the colored center
- Create the pupil:
- A tiny dot of dark chocolate in the exact center brings the whole eye to surprisingly life-like detail
- Draw the spooky veins:
- Use a toothpick dipped in red gel to create irregular branching lines radiating outward from the iris
- Let everything set completely:
- Give them at least an hour at room temperature or fifteen minutes in the refrigerator before attempting to move or serve them
 Save to Pinterest
 My niece helped me decorate a batch last year and decided to make half of them with mismatched colored eyes, claiming they were mutant zombie eyeballs. They ended up being the most talked-about treats at the party. Sometimes the creative accidents are better than the original plan.
Getting the Perfect Shape
After years of making cake balls in various shapes, I have learned that slightly imperfect spheres actually look more realistic for eyeballs. The tiny irregularities make them look eerily organic rather than perfectly spherical like manufactured candy. Do not stress about absolute perfection here.
Choosing Your Coating
White candy melts produce the smoothest finish and the most opaque white color, which is essential for that stark eyeball appearance. Real white chocolate can sometimes look slightly yellowish and does not coat quite as evenly, though it does taste more premium.
Making Them Ahead
These actually improve after a day in the refrigerator as the flavors meld together and the coating firms up beautifully. I have made them up to three days in advance, stored in an airtight container between layers of parchment paper.
- Consider adding a small pinch of sea salt to the dark chocolate pupils for contrast
- If serving outdoors, keep them chilled until the last possible moment
- Extra red gel can be thinned with a drop of water for more delicate vein work
 Save to Pinterest
 There is something delightfully subversive about serving food that stares back at you. These eyeballs have become our most requested Halloween treat, and I have even adapted the concept for Christmas with red-veined reindeer eyes.
Recipe FAQs
- → How long do Halloween cake eyeballs stay fresh?
-
Store in an airtight container in the refrigerator for up to 5 days. The chilled texture helps maintain the firm coating and moist interior. Bring to room temperature 15 minutes before serving for optimal flavor and texture.
- → Can I make these ahead of time for a Halloween party?
-
Absolutely. Prepare the cake balls and freeze them undecorated for up to 2 weeks. Thaw overnight in the refrigerator, then dip and decorate the day before your event. The finished eyeballs also hold up well for 2-3 days when stored properly chilled.
- → What's the best way to melt the chocolate for coating?
-
Use short 30-second bursts in the microwave, stirring between each interval. This prevents seizing and ensures smooth, even melting. Alternatively, use a double boiler on low heat, stirring constantly until glossy and fluid. The chocolate should be fluid but not hot—around 32-34°C is ideal for dipping.
- → Can I use different cake flavors?
-
Chocolate cake works beautifully and creates an even creepier appearance. Red velvet makes them look especially gory. Just ensure the cake is completely cooled before crumbling, and adjust the frosting quantity slightly—denser cakes need less frosting to bind properly.
- → How do I prevent the cake balls from falling off the sticks?
-
Chill the formed balls thoroughly—at least 20 minutes in the freezer—before dipping. When inserting sticks, dip the tip in melted chocolate first, then gently twist into the ball. Let them set completely in the refrigerator before decorating or serving to ensure stability.
- → What alternatives work for the colored iris decoration?
-
Colored candy melts in blue, green, or purple work best for the iris. If unavailable, tint white chocolate with gel food coloring, or use small rounds of colored fondant. For a simpler version, use M&M candies or chocolate chips pressed into the soft coating before it sets.
