 Save to Pinterest
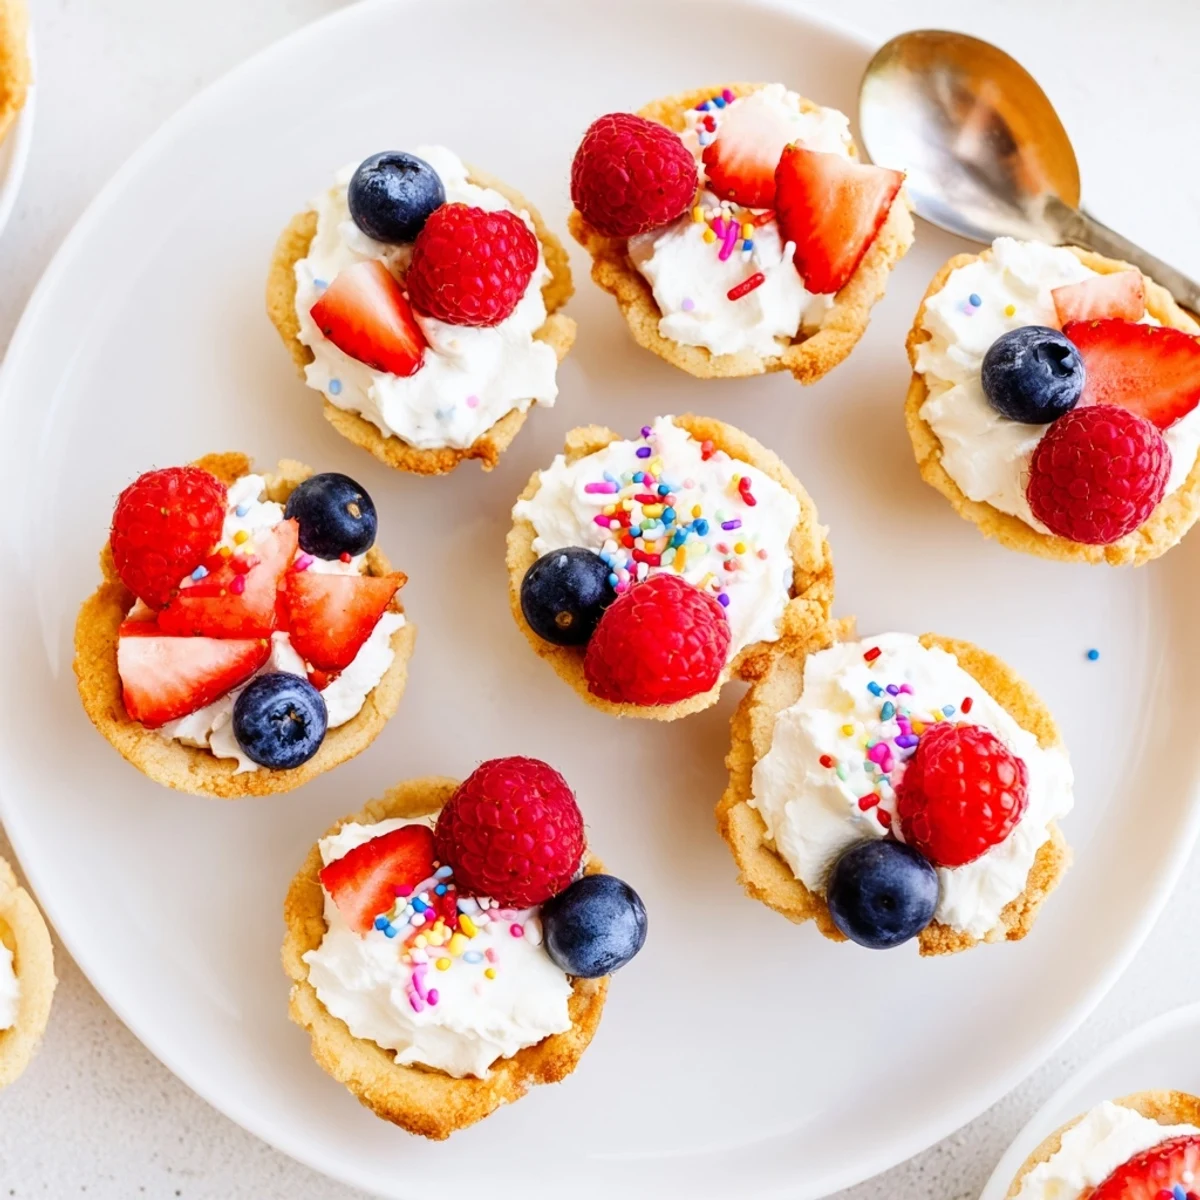
 Create irresistible bite-sized treats by pressing classic sugar cookie dough into mini muffin tins. Bake until golden, then press centers while warm to form perfect cup shapes. Fill each cooled cup with freshly whipped vanilla cream and top with vibrant fresh berries like raspberries and strawberries, colorful sprinkles, or mini chocolate chips. These handheld delights work wonderfully for birthday parties, holiday gatherings, or as an engaging weekend baking activity with children.
My neighbor Sarah brought these to our summer block party last year and I honestly couldn't stop eating them. She set out a whole platter with different fillings and watching everyone customize their own tiny cups became the best part of the afternoon. The kids went straight for the sprinkles, naturally, while the adults debated between lemon curd and chocolate ganache like it was a serious decision. Now they're my go-to whenever I need something that looks impressive but secretly takes almost no effort.
I made these for my daughter's birthday instead of a regular cake and the kids went absolutely wild. They each got to choose their own filling and topping combination and honestly, watching four-year-olds seriously debate between berries and chocolate chips was the highlight of my year. One little boy told me it was the best day of his life, which feels like a pretty strong endorsement for a sugar cookie.
Ingredients
- 2 1/4 cups all-purpose flour: This foundation creates the perfect cup structure that holds its shape without getting tough or crumbly
- 1/2 tsp baking soda: Just enough lift to give the cups a tender crumb while still staying sturdy
- 1/2 tsp salt: Balances the sweetness and wakes up all the vanilla notes
- 3/4 cup unsalted butter, softened: Room temperature butter creamed with sugar is what gives these their classic sugar cookie texture and golden edges
- 1 cup granulated sugar: Creates that crisp exterior and sweet bite we all expect from a proper sugar cookie
- 1 large egg: Binds everything together and adds structure to the dough
- 2 tsp pure vanilla extract: Don't skimp here—this is the backbone flavor that makes people ask what's different about your cookies
- 1 cup heavy cream, chilled: Whips into the most stable, cloud-like filling that holds up beautifully
- 2 tbsp powdered sugar: Just enough sweetness for the whipped cream without making it cloying
- 1/2 tsp vanilla extract: The same vanilla magic in the filling ties everything together
Instructions
- Get your oven ready:
- Preheat to 350°F and give your 24-cup mini muffin tin a light coating of butter or cooking spray
- Whisk the dry team:
- In a medium bowl, combine the flour, baking soda, and salt until everything is evenly distributed
- Cream the butter and sugar:
- Beat the softened butter and granulated sugar for about 2 minutes until it's pale and fluffy—this creates those perfect crispy edges
- Add the egg and vanilla:
- Beat until everything is fully combined and the mixture looks smooth and glossy
- Bring it all together:
- Gradually mix in the dry ingredients just until you can't see any flour anymore—don't overwork it or the cups will be tough
- Shape your cups:
- Scoop about 1 tablespoon of dough into each muffin cup and gently press it up the sides to form a little bowl shape
- Bake until golden:
- Slide them in for 10 to 12 minutes until the edges are just starting to turn light golden brown
- Create the cup shape:
- While they're still warm, gently press the center of each cookie with the back of a spoon to deepen that cup shape
- Let them cool:
- Wait 10 minutes in the tin, then carefully transfer to a wire rack until completely cool
- Whip the cream:
- In a chilled bowl, whip the heavy cream, powdered sugar, and vanilla until you have stiff peaks
- Fill and decorate:
- Pipe or spoon the whipped cream into each cooled cup and add whatever toppings make you happy
 Save to Pinterest
 My aunt requested these for her garden party last spring and I nearly panicked because I'd never made them for a formal event before. But standing there watching all these sophisticated adults in party clothes get genuinely excited about building their own tiny cookie creations reminded me that the best food is the kind that makes you feel like a kid again.
Make-Ahead Magic
Bake the cookie cups up to three days ahead and store them in an airtight container at room temperature. The whipped cream is best made the day of, but you can whip it a few hours in advance and keep it chilled in the fridge—it holds up surprisingly well. Just fill and decorate right before serving for the freshest presentation.
Filling Ideas Beyond Whipped Cream
Lemon curd gives these a bright, tangy twist that cuts through the sweet cookie base perfectly. Chocolate ganache is the obvious choice for chocolate lovers—just let it set up slightly before filling so it doesn't overflow the cups. I've also used pastry cream, fruit preserves, and even cheesecake filling when I wanted something extra rich and indulgent.
Serving Suggestions
Set up a little filling station with bowls of different options and let people build their own. It's unexpectedly fun and becomes a conversation starter at parties. Arrange them on a tiered stand or pretty platter—they look much more impressive than their humble ingredients would suggest.
- Use a small cookie scoop for consistent dough portions that bake evenly
- If your dough gets too soft while working, pop the bowl in the fridge for 10 minutes
- The cups should be completely cool before filling or the cream will start to melt
 Save to Pinterest
 These little cups have become my secret weapon for whenever I need to bring something that looks like I tried way harder than I actually did. Sometimes the best recipes are the ones that make you look like a kitchen wizard with minimal effort and maximum joy.
Recipe FAQs
- → Can I make the dough ahead of time?
-
Yes, prepare the dough up to 2 days in advance and store refrigerated in an airtight container. Let soften at room temperature for 15 minutes before shaping into muffin tins.
- → What other fillings work well?
-
Beyond vanilla whipped cream, try lemon curd for tangy brightness, chocolate ganache for richness, cream cheese frosting, or even pastry cream filled with fresh fruit.
- → How do I prevent sticking?
-
Generously grease your mini muffin tin with butter or cooking spray. For extra insurance, lightly dust with flour after greasing. Let them cool about 10 minutes before carefully removing.
- → Can I freeze these?
-
Bake and cool unfilled cups completely, then freeze in a freezer-safe bag for up to 3 months. Thaw at room temperature and fill before serving for best texture.
- → Why press centers while warm?
-
Warm cookie dough is pliable, making it easy to reshape without cracking. This creates deeper wells for maximum filling capacity and prevents overflow when adding toppings.
- → Can I use regular-sized muffin tins?
-
You can, but you'll need to adjust baking time to 14-16 minutes and increase dough to about 2 tablespoons per cup. The yield will drop to approximately 12 larger cups.
