 Save to Pinterest
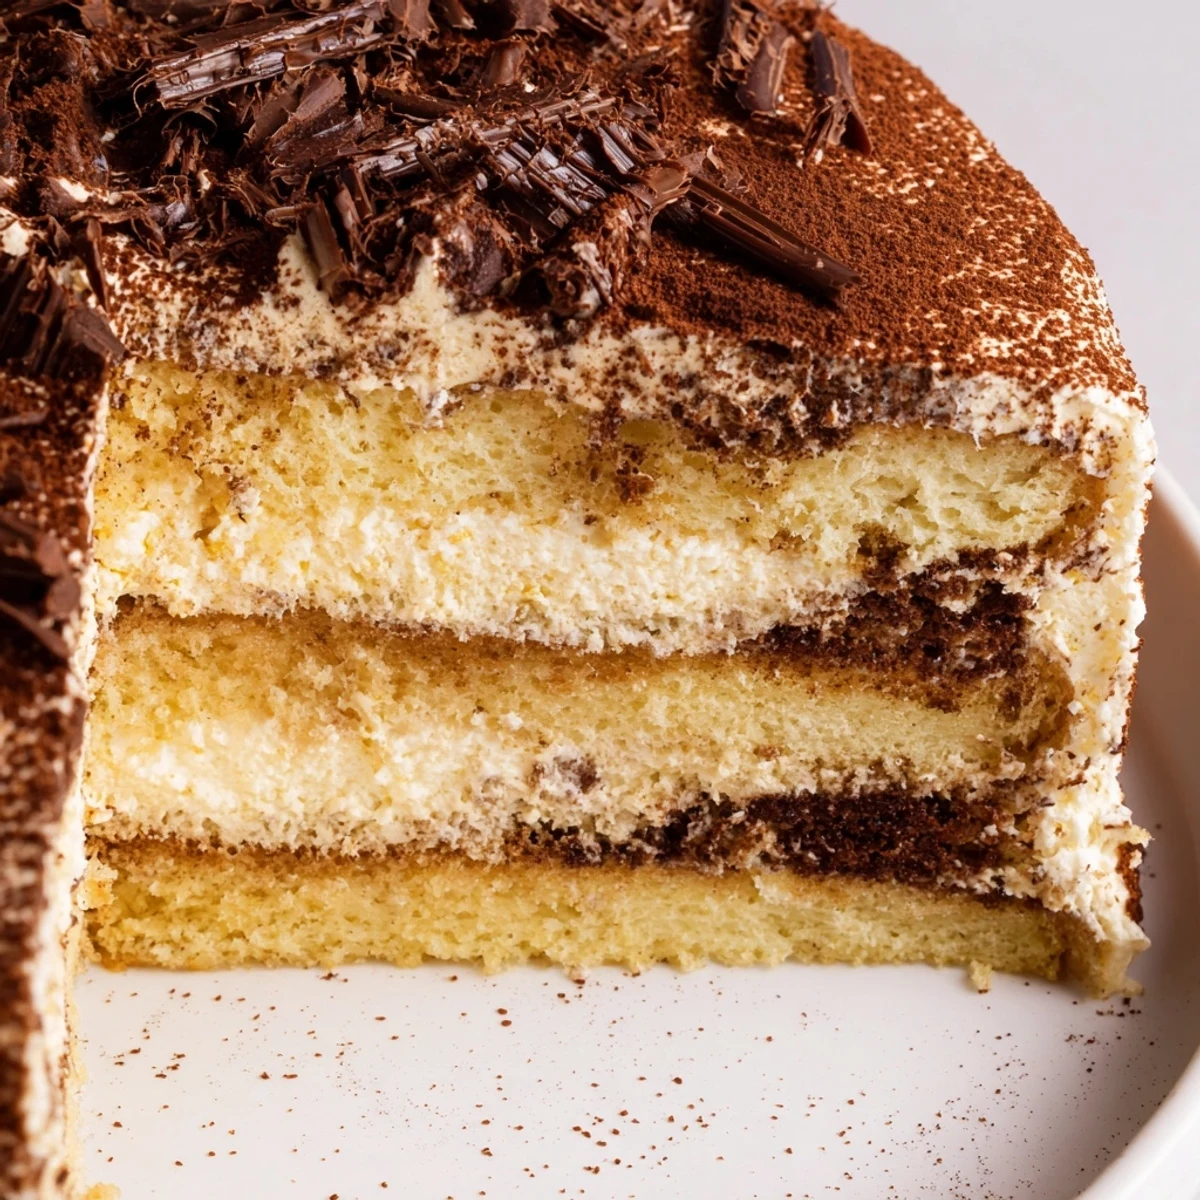
 This elegant Italian-inspired dessert features four tender sponge layers brushed with sweetened espresso syrup, then filled and frosted with a light mascarpone cream made from whipped heavy cream and vanilla-sweetened cheese. After chilling for at least four hours, the cake develops its signature velvety texture and deep coffee flavor. The final dusting of unsweetened cocoa powder creates a beautiful presentation while adding a complementary bitter note to balance the rich cream filling.
The first time I made tiramisu cake, it was for my father's birthday and he pretended not to notice the slightly uneven layers. He just kept taking bite after bite, nodding between forkfuls, saying how much it reminded him of the cafes we visited in Rome. That moment of messy imperfection becoming something beautiful stuck with me, and now this cake is my go to celebration dessert.
Last Christmas, my sister requested this cake instead of a traditional yule log, watching over my shoulder as I brushed each layer with coffee syrup. She insisted on quality espresso, dragging me to the local roaster at 8am to ensure we had the perfect brew. Now I can not make it without thinking of her standing there in her pajamas, debating whether we needed an extra shot of Kahlúa.
Ingredients
- All-purpose flour: The structure builder here, providing a tender crumb that can absorb coffee syrup without falling apart
- Granulated sugar: Sweetens both the cake layers and the coffee syrup, balancing the bitter espresso notes
- Whole milk: Adds moisture to the cake, creating a soft sponge that contrasts beautifully with the creamy filling
- Unsalted butter: Room temperature butter incorporates better into the batter, giving the cake richness and tenderness
- Large eggs: The backbone of both the cake structure and the fluffy texture, so do not skimp here
- Baking powder: Gives the cake its lift, creating layers that are light enough to soak up the syrup
- Salt: Just a pinch enhances all the flavors and balances the sweetness
- Vanilla extract: Pure vanilla adds a warm background note that bridges the gap between coffee and cream
- Strong espresso or coffee: Cooled completely so it does not melt the mascarpone, this is the heart of the tiramisu flavor
- Coffee liqueur: Optional but adds that adult depth that makes the cake feel special and sophisticated
- Heavy cream: Must be cold to whip properly, creating those gorgeous stiff peaks that make the filling light as air
- Mascarpone cheese: Room temperature mascarpone blends seamlessly into the whipped cream without curdling or becoming grainy
- Powdered sugar: Sweetens the filling without adding graininess, dissolving perfectly into the mascarpone mixture
- Unsweetened cocoa powder: Dust through a fine mesh sieve for that professional bakery finish and bittersweet contrast
- Dark chocolate shavings: The optional garnish that makes everyone think you spent hours on presentation
Instructions
- Get your oven and pans ready:
- Preheat to 350°F (175°C) and grease two 8-inch round pans, lining the bottoms with parchment paper for easy release later.
- Build your base:
- Beat eggs and sugar until fluffy and pale, then blend in butter and vanilla until everything is smooth and creamy.
- Combine the dry ingredients:
- Whisk flour, baking powder, and salt in a separate bowl so they are evenly distributed before adding to the wet mixture.
- Make the batter:
- Add dry ingredients and milk to the egg mixture in alternating additions, mixing just until combined so you do not overwork the gluten.
- Bake the layers:
- Divide batter between prepared pans and bake 22 to 25 minutes until a toothpick comes out clean, then cool in pans 10 minutes before transferring to a wire rack.
- Prepare the coffee syrup:
- Stir together cooled espresso, coffee liqueur if using, and sugar until the sugar completely dissolves into the liquid.
- Whip the cream:
- In a chilled bowl, whip heavy cream to stiff peaks, watching carefully so it does not turn to butter.
- Make the mascarpone filling:
- Beat mascarpone with powdered sugar and vanilla until smooth, then gently fold in the whipped cream until no streaks remain.
- Split and soak the cake:
- Slice each cooled cake layer horizontally to create four layers total, brushing each generously with coffee syrup until moist but not soggy.
- Assemble the masterpiece:
- Layer cake, syrup, and filling, ending with mascarpone on top, then chill at least 4 hours or overnight for the flavors to meld together.
- Finish and serve:
- Dust cocoa powder over the top through a fine mesh sieve and add chocolate shavings just before serving for that beautiful finish.
 Save to Pinterest
 My friend Sarah claimed she did not even like dessert until she tried this cake at a dinner party, hovering near the counter until I finally cut her an extra slice to take home. Seeing someone who usually skips sweets become so invested in a recipe reminds me why I bother with the extra steps and chilling time.
The Coffee Factor
I have learned that the quality of espresso matters more than you might expect. Cheap instant coffee makes the whole cake taste flat, while a freshly brewed good quality espresso gives those distinctive deep notes that make people pause and ask what is different about this recipe.
Make Ahead Magic
This cake actually improves after resting in the refrigerator overnight, giving the coffee time to permeate every crumb and the flavors time to become friends. I always make it the day before serving, which also means zero last minute stress when guests arrive.
Serving Suggestions
Cutting this cake is an art form, so use a sharp knife dipped in hot water and wiped clean between slices for those picture perfect portions. Serve it with tiny glasses of espresso or sweet dessert wine, and watch how quickly people ask for seconds.
- Let chilled cake sit at room temperature for 15 minutes before slicing for cleaner cuts
- The cocoa powder layer is best applied just before serving to prevent it from absorbing into the cream
- Leftovers keep surprisingly well for 3 to 4 days in the refrigerator, though they rarely last that long
 Save to Pinterest
 There is something deeply satisfying about serving a dessert that makes people close their eyes and savor every bite, completely forgetting whatever conversation was happening around the table. That pause, that moment of pure enjoyment, is exactly why this recipe has earned its permanent place in my collection.
Recipe FAQs
- → Can I make this cake ahead of time?
-
Absolutely. In fact, this tastes better after chilling overnight. The coffee syrup fully penetrates the sponge layers, and the mascarpone filling sets into a perfectly stable structure. Wrap tightly and refrigerate for up to 2 days before serving.
- → What if I don't have coffee liqueur?
-
Simply omit it. The syrup still provides excellent coffee flavor using just espresso and sugar. You can also add a teaspoon of vanilla or almond extract to enhance the depth without alcohol.
- → Can I freeze the assembled cake?
-
Yes, freeze the fully assembled cake (without cocoa dusting) for up to 1 month. Wrap tightly in plastic and foil. Thaw overnight in the refrigerator, then dust with cocoa powder just before serving.
- → Why must the mascarpone be at room temperature?
-
Room-temperature mascarpone blends smoothly without creating lumps. Cold cheese can cause the filling to curdle or become grainy. Plan ahead and remove it from the fridge about 30 minutes before making the filling.
- → Can I use instant coffee instead of espresso?
-
Instant coffee dissolved in hot water works, but freshly brewed espresso provides a more authentic, robust flavor. If using instant, make it slightly stronger than you normally would to compensate.
- → My sponge layers turned out dense. What went wrong?
-
Overmixing the batter after adding flour can develop too much gluten, creating a tough texture. Also, ensure your eggs and butter are properly creamed until fluffy before adding other ingredients, which creates the light, airy crumb.
