 Save to Pinterest
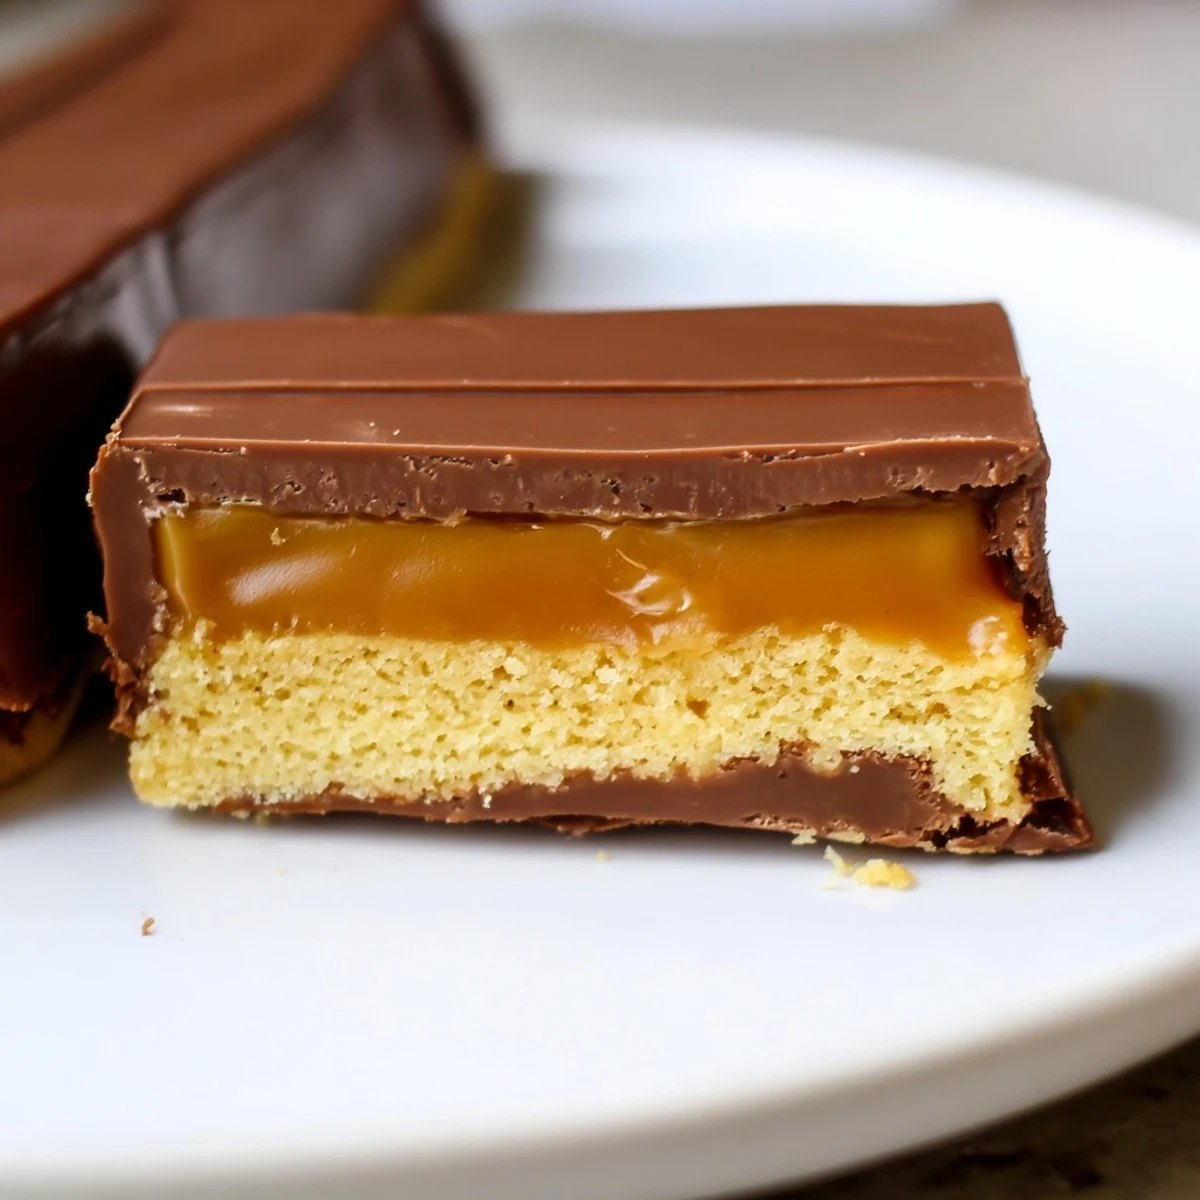
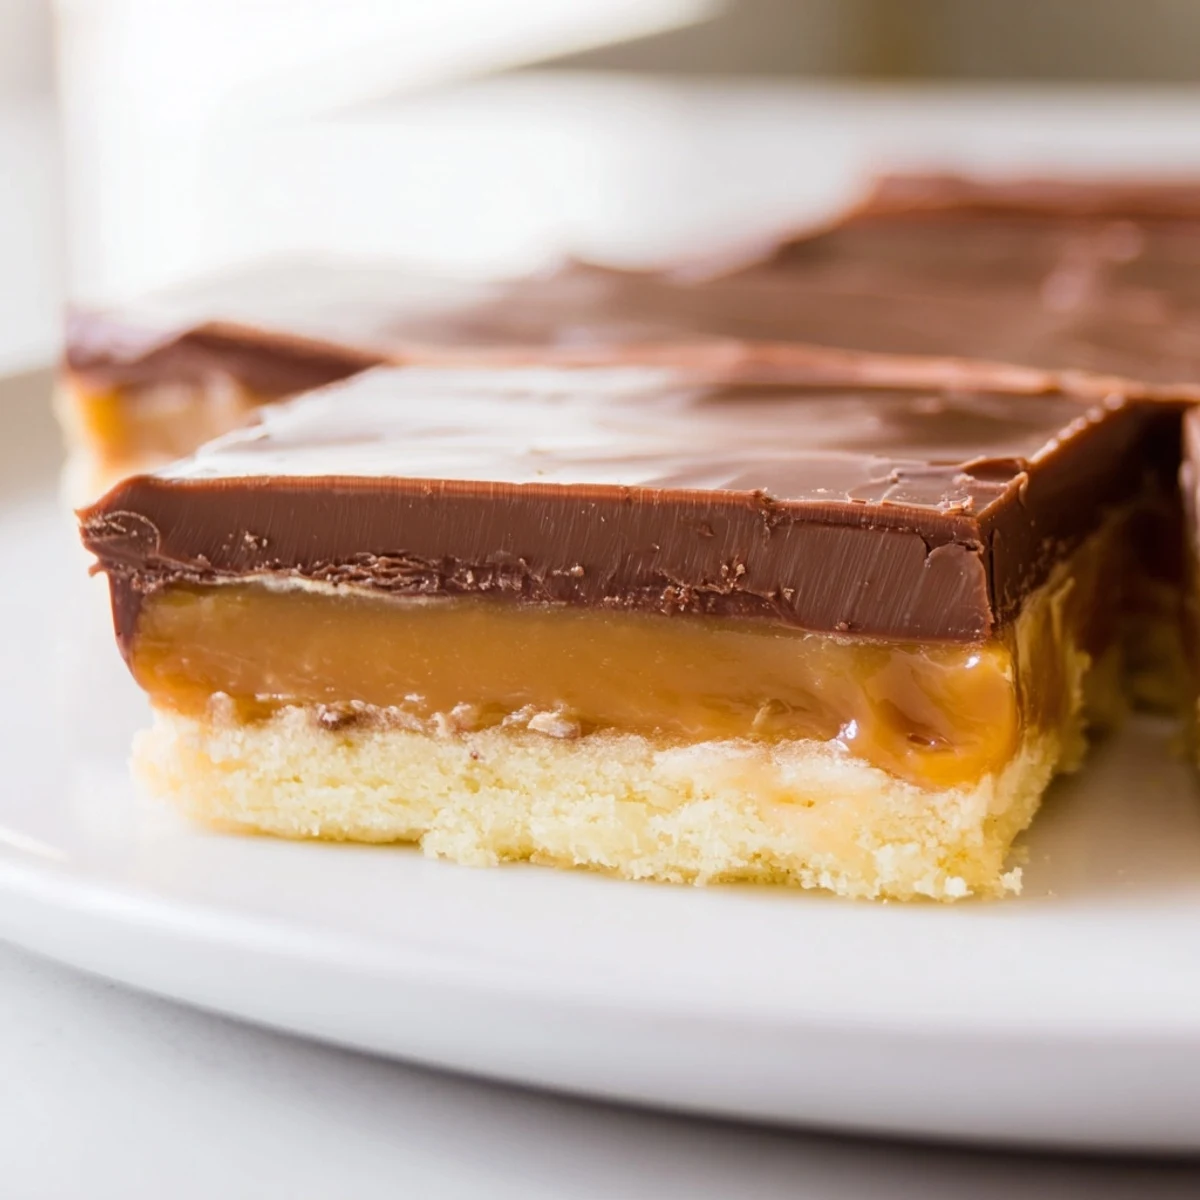
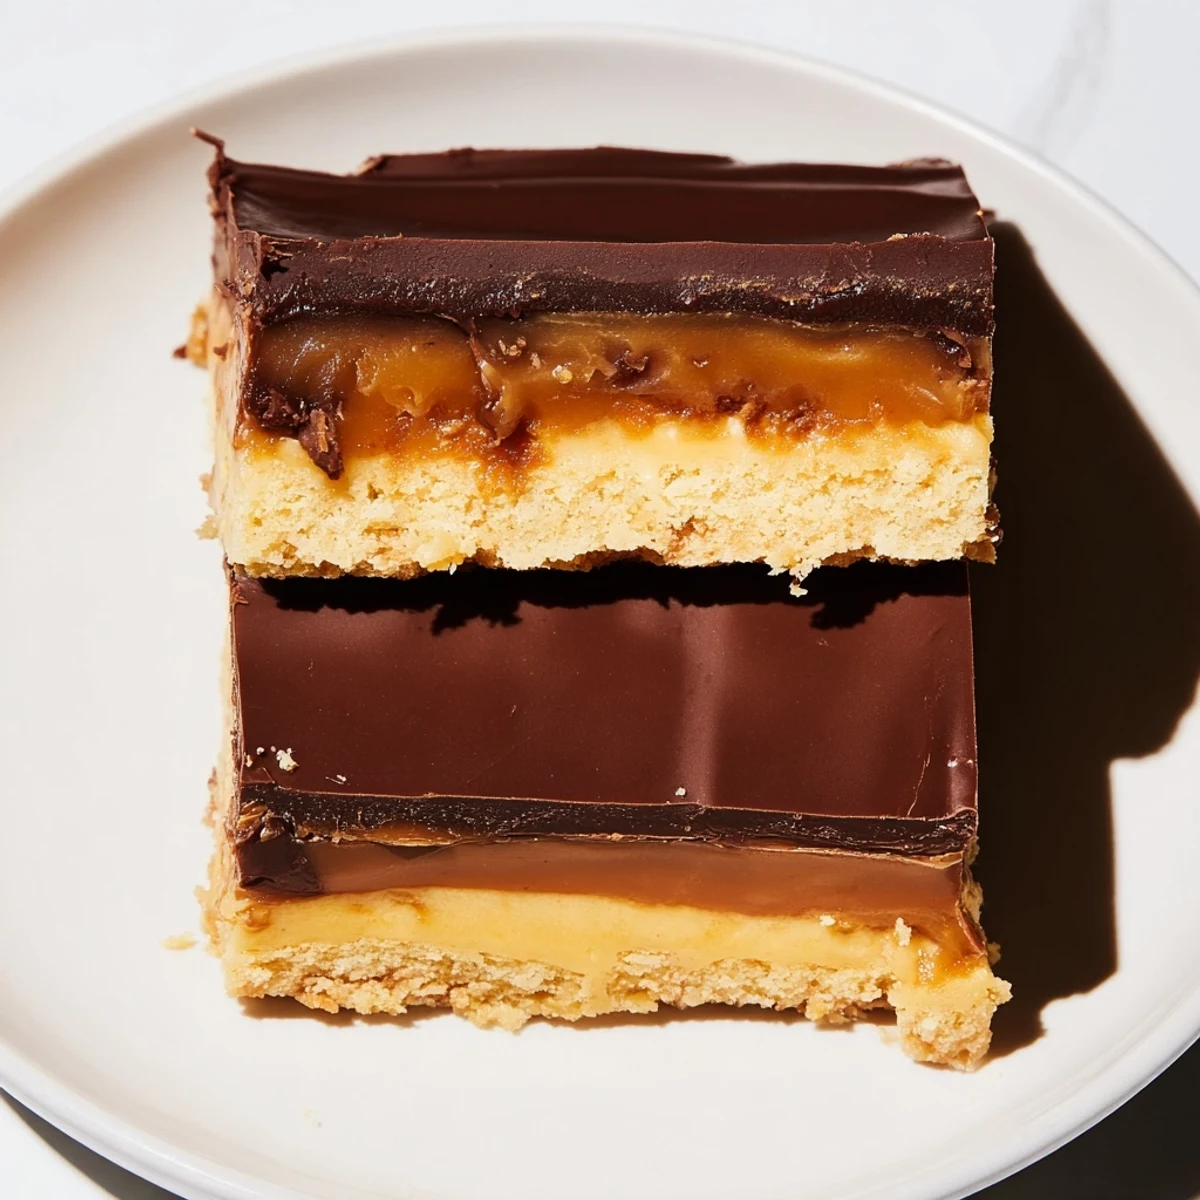
 These impressive dessert bars capture everything beloved about the classic candy bar, made entirely from scratch. Start with a tender, buttery shortbread foundation that bakes until golden and crisp. Top with a luscious homemade caramel layer cooked to perfect consistency—rich, gooey, and dotted with fine sea salt to enhance the sweetness. Finish with a glossy milk chocolate coating that sets beautifully. The result is 16 perfectly portioned bars with that signature crunch-to-chew-to-cream texture combination. While they require some patience for cooling and setting between layers, the hands-on time is manageable and the impressive presentation makes them ideal for gatherings, gift-giving, or special occasions.
The smell of buttery shortbread always pulls me back to my college apartment kitchen, where I attempted my first from-scratch caramel and ended up with a burnt sugar mess that I still ate anyway because the base was that good.
I made these for a friend's birthday dinner last year, and halfway through slicing them, we abandoned forks entirely and ate the messy edges standing up by the counter.
Ingredients
- Unsalted butter: Using room temperature butter for the base creates that tender melt-in-your-mouth texture, while cold butter in the caramel helps it set properly
- Granulated sugar: Creates the classic crisp shortbread foundation that wont get soggy under the caramel layer
- All-purpose flour: Dont overmix once you add the flour or youll develop gluten and lose that delicate shortbread crumb
- Fine sea salt: Just enough to brighten all three layers without making these taste like salted caramel
- Light brown sugar: The molasses content gives the caramel that deep amber color and complex flavor
- Sweetened condensed milk: This is the secret ingredient that makes foolproof caramel without any worry about seizing or burning
- Milk chocolate: Use a good quality brand since the chocolate flavor really shines through the rich layers below
Instructions
- Prep your pan and oven:
- Line a 9x13-inch baking pan with parchment paper, letting the edges hang over like a sling. This will make lifting the bars out so much easier later.
- Make the shortbread base:
- Cream the butter and sugar until its pale and fluffy, then fold in the flour and salt just until the dough comes together. Press it evenly into your prepared pan and prick all over with a fork.
- Bake until golden:
- Bake at 350°F for about 20 minutes until the edges are lightly golden. Let it cool completely in the pan before adding the caramel layer.
- Cook the caramel:
- Melt butter in a heavy saucepan, then stir in brown sugar, condensed milk, and salt. Let it bubble gently for 7 to 10 minutes, stirring constantly until it thickens and reaches 225°F on a thermometer.
- Layer the caramel:
- Pour the hot caramel over your cooled shortbread and spread it evenly. Let it set at room temperature for about an hour until its firm to the touch.
- Add the chocolate:
- Melt the chocolate with a tablespoon of butter using a double boiler or microwave. Pour it over the caramel and tilt the pan to spread it evenly without disturbing the caramel underneath.
- Set and slice:
- Let the chocolate firm up at room temperature or refrigerate for 30 minutes. Use the parchment overhang to lift the whole slab out, then cut into 16 squares with a sharp knife, wiping the blade clean between cuts.
 Save to Pinterest
 These bars have become my go-to for potlucks because they travel well and actually improve after a day in the fridge, letting all the flavors meld together.
Getting Clean Cuts
The trick to restaurant-worthy edges is running your knife under hot water and wiping it clean between every single cut. Cold bars + hot knife = perfect slices that hold their shape.
Temperature Matters
If your kitchen is particularly warm, the chocolate might streak when you cut it. Pop the whole pan in the fridge for 15 minutes before slicing and you will get those clean, professional-looking edges.
Make-Ahead Magic
These bars actually taste better the next day once the shortbread has softened slightly from the caramel. You can make them up to three days ahead and store them at room temperature.
- Cut them while slightly cold from the fridge for the neatest edges
- Separate layers with wax paper if you need to stack them for storage
- Bring to room temperature before serving for the best texture
 Save to Pinterest
 There is something deeply satisfying about making a candy bar classic from scratch. These homemade versions taste like pure nostalgia.
Recipe FAQs
- → How long do these bars need to set?
-
The caramel layer needs about 1 hour to firm at room temperature, and the chocolate topping sets in roughly 30 minutes. For best results, plan for approximately 2 hours total from start to finish, including cooling time between layers. Refrigerating can speed up the process but may cause the chocolate to lose its sheen.
- → Can I make these ahead of time?
-
Absolutely! These bars actually improve after resting for a day as the flavors meld together. Store in an airtight container at room temperature for up to 5 days. Layer between parchment paper to prevent sticking. They also freeze well for up to 3 months—thaw overnight in the refrigerator.
- → What's the best way to get clean cuts?
-
Use a sharp knife warmed under hot water and dried between cuts. Wiping the blade clean after each slice prevents the caramel from dragging and creates neat edges. For extra precision, chill the bars for 15-20 minutes before cutting, but don't let them get too hard or the chocolate may crack.
- → Can I substitute the corn syrup?
-
Golden syrup or honey can replace corn syrup in the caramel layer, though honey will add a distinct floral flavor. Maple syrup works but may affect the texture slightly. Avoid omitting the syrup entirely—it helps prevent crystallization and ensures smooth, pourable caramel.
- → What type of chocolate works best?
-
Milk chocolate creates the most authentic candy bar experience, but dark chocolate (60-70%) balances the sweetness beautifully if you prefer less sugary results. White chocolate or a marble effect also works for variation. Chop chocolate bars into uniform pieces for even melting, or use high-quality chips.
- → Why did my caramel turn grainy?
-
Grainy caramel typically results from sugar crystals forming during cooking. Always stir gently and avoid splashing mixture up the sides of the pan. If crystals form, don't scrape down the sides—the syrup on the pan walls can seed crystallization. A small splash of water or lemon juice can help prevent this issue.
