 Save to Pinterest
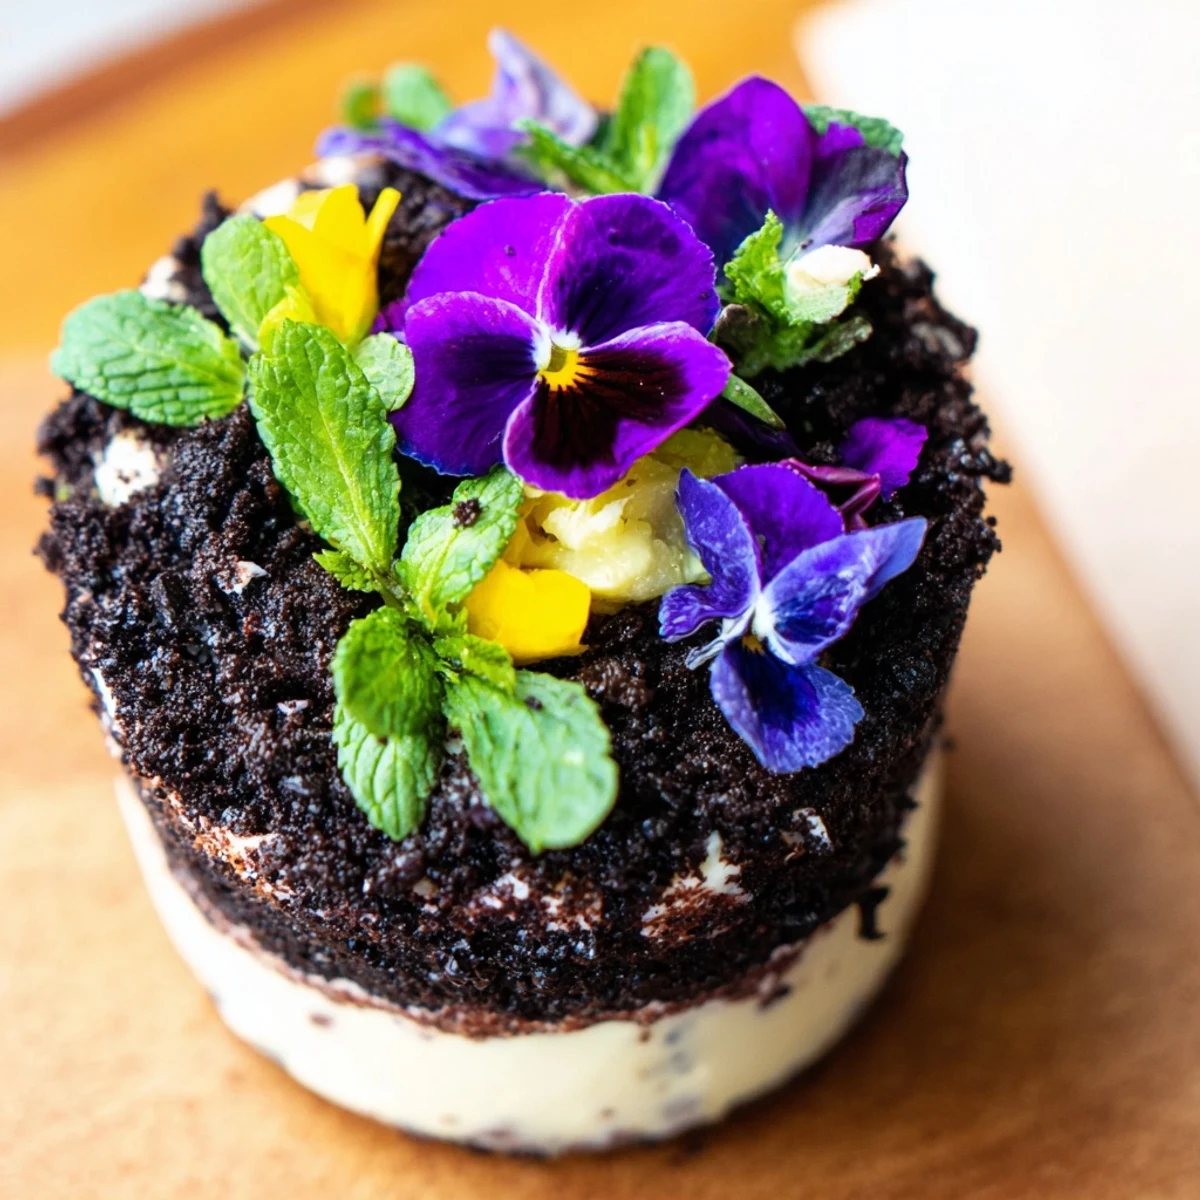
 This enchanting dessert transforms simple chocolate cake and whipped cream into a stunning miniature garden. Rich chocolate cake crumbs are layered with silky vanilla cream and topped with crushed chocolate cookies that resemble dark soil. The magic happens when you arrange colorful edible flowers like pansies, violets, and nasturtiums along with fresh mint and herb sprigs to create a living garden effect.
Perfect for spring gatherings, garden parties, or special celebrations, these individual potted creations delight both eyes and taste buds. The combination of moist chocolate, cool cream, and delicate floral notes creates an unforgettable dessert experience.
Assembly takes just minutes once components are prepared, and the result is guaranteed to impress guests who may not believe these beautiful gardens are entirely edible.
My daughter had been begging me to help with her school garden project, and I wanted to surprise her with something that captured that same magic but in dessert form. I stumbled across the idea of edible potted gardens while flipping through an old bakery magazine at the dentist office, and I could not stop thinking about how perfectly it would combine her love for growing things with my love for baking. The first time I made these, she literally squealed and thought I had served her actual dirt from the backyard until she took that first suspicious bite.
Last spring I made these for my book club meeting, and one member actually hesitated for a solid minute before trying hers because she could not believe I was serving soil. When she finally took a bite, her eyes went wide and she immediately asked for the recipe before even finishing her portion. Now every time we have a gathering, someone casually mentions they would not mind another garden dessert if I happen to have extra flower pots lying around.
Ingredients
- All-purpose flour (125 g): The structural foundation that gives the chocolate cake its tender crumb and keeps all those gorgeous layers from collapsing
- Granulated sugar (200 g): Essential not just for sweetness but for creating that moist texture that makes people ask what your secret ingredient is
- Unsweetened cocoa powder (45 g): Use a good quality Dutch-processed cocoa because cheap cocoa will leave you with a disappointing chocolate flavor that nobody wants in their dirt
- Baking powder and soda: These work together to give the cake enough lift to become tender layers instead of dense chocolate bricks
- Salt (1/2 tsp): Do not skip this because it actually intensifies the chocolate flavor and makes everything taste more like itself
- Buttermilk (120 ml): The acid in buttermilk reacts with the baking soda and creates an incredibly tender cake crumb that stays moist for days
- Vegetable oil (60 ml): Oil keeps the cake softer and moister than butter would, which is exactly what you want for something that needs to be crumbled
- Large egg: Adds structure and richness while helping bind everything together into a cohesive cake that layers beautifully
- Vanilla extract (1 tsp for cake + 1/2 tsp for cream): Pure vanilla extract is worth the investment here because artificial vanilla leaves a weird aftertaste
- Hot water (120 ml): This hot water trick blooms the cocoa powder and creates an incredibly moist cake that almost seems too good to be crumbled up
- Heavy cream (240 ml): Must be very cold straight from the refrigerator or it will not whip properly no matter how long you beat it
- Powdered sugar (30 g): Sift this first to avoid lumpy whipped cream that ruins the smooth texture between your cake layers
- Cream cheese (200 g, optional): Adding this makes the cream filling more stable and gives it a slight tang that cuts through all that sweet chocolate
- Chocolate cookie crumbs (100 g): Oreos work perfectly but any dark chocolate cookie will create that convincing soil appearance that makes this dessert so fun
- Edible flowers (40 g): Only use flowers specifically labeled as edible from trusted sources because decorative flowers from florists can actually make people quite sick
- Fresh mint leaves and herb sprigs: These add the perfect finishing touch that makes your dessert garden look like it was freshly planted moments before serving
Instructions
- Prepare your oven and pan:
- Preheat to 350°F (175°C) and grease your baking pan thoroughly because chocolate cake loves to stick to pans. Line the bottom with parchment paper so you can easily remove the cake later for crumbling.
- Whisk the dry ingredients:
- In a large bowl, combine flour, sugar, cocoa powder, baking powder, baking soda, and salt until everything looks evenly distributed. This step ensures your cake bakes evenly without weird pockets of flour or cocoa.
- Mix the wet ingredients:
- Add buttermilk, oil, egg, and vanilla to the dry ingredients and mix until you have a smooth, thick batter. The mixture will look deceivingly thick at this stage but do not panic.
- Add the magic hot water:
- Pour in the hot water slowly while mixing constantly because the batter will become incredibly thin. This is completely normal and exactly what gives the cake its signature moist texture.
- Bake until perfect:
- Pour the thin batter into your prepared pan and bake for 25 to 30 minutes. A toothpick inserted in the center should come out clean but do not overbake or your cake layers will be dry instead of wonderfully moist.
- Let it cool completely:
- Allow the cake to cool in the pan for about 10 minutes before removing it to cool completely on a wire rack. Warm cake will melt your whipped cream filling and turn your beautiful layers into a sad muddy mess.
- Whip the cream filling:
- Beat the cold heavy cream with powdered sugar and vanilla until medium-stiff peaks form. Add softened cream cheese if using and whip until smooth and thick enough to hold its shape between cake layers.
- Crumble your cake:
- Break the cooled chocolate cake into small, even crumbs using your hands or a fork. The texture should resemble potting soil without any large chunks that would make your layered dessert look bumpy and uneven.
- Build your garden layers:
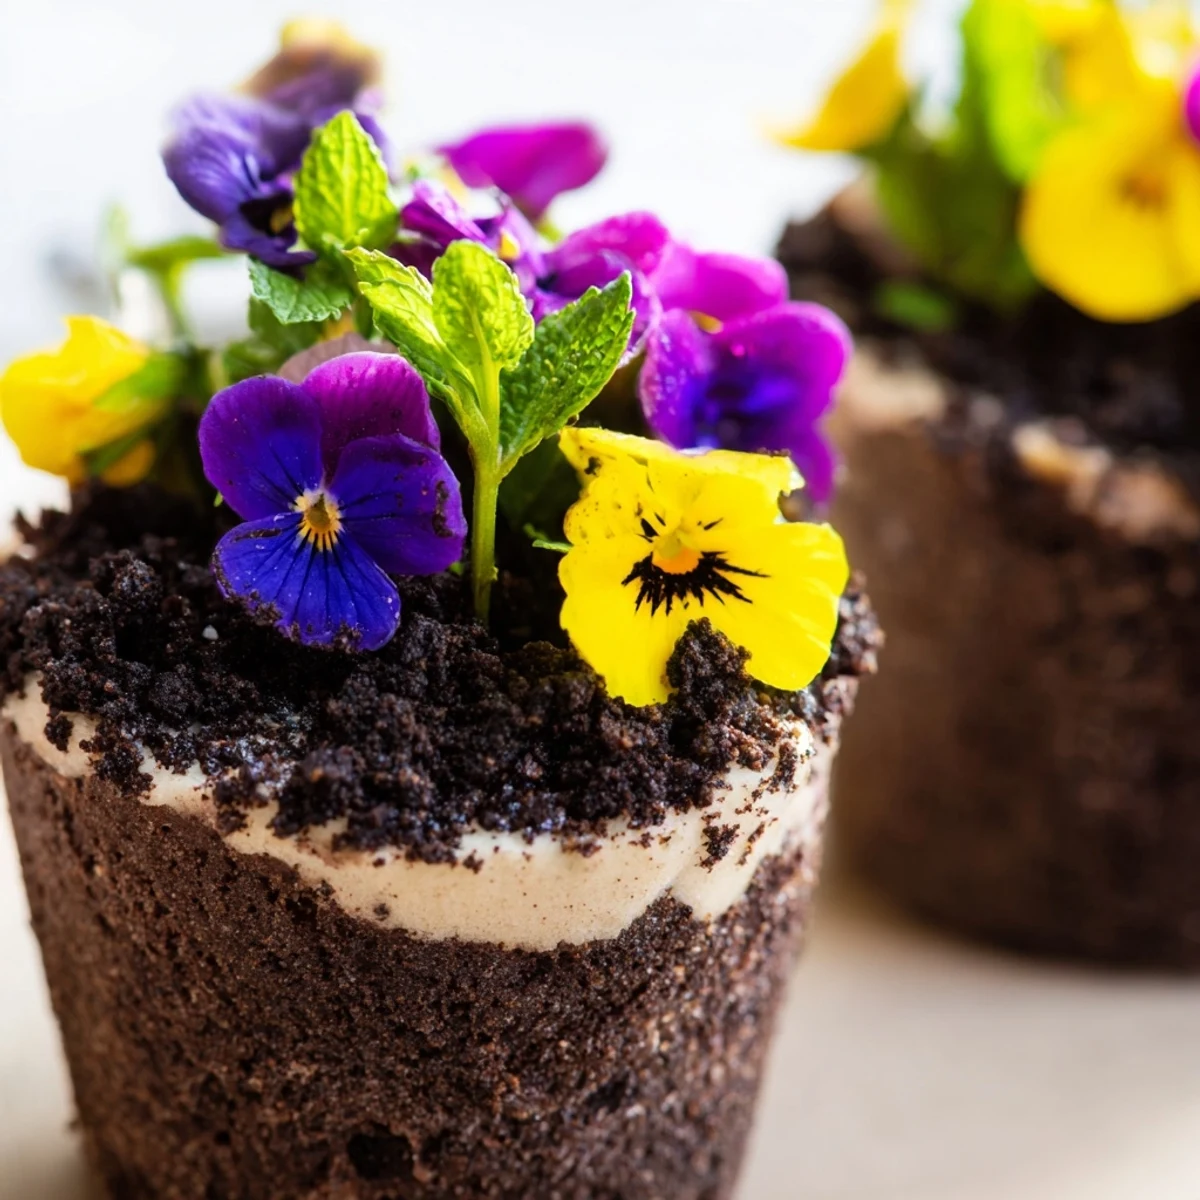
- In clean flower pots or dessert cups, add a layer of cake crumbs followed by cream, then more cake. Top generously with chocolate cookie crumbs to create that convincing soil layer that makes everyone do a double take.
- Plant your edible garden:
- Arrange edible flowers, mint leaves, and herb sprigs on top of the cookie soil to create a whimsical garden effect. Tuck some flowers partly into the crumbs so they look like they are actually growing from the soil.
- Chill before serving:
- Refrigerate for at least 30 minutes so all the flavors meld together and the layers firm up slightly. Cold layers are much easier to serve and taste even better after the flavors have had time to become friends.
 Save to Pinterest
 The best moment was when my normally picky nephew took one look at his dessert pot and announced he would never eat dirt. Ten minutes later he was asking if he could have seconds and if I could make his birthday cake look like a vegetable garden next month.
Choosing Your Flowers
Pansies and violets are my go to flowers because they have such a delicate, slightly sweet flavor that pairs beautifully with chocolate. Nasturtiums add a lovely peppery kick that cuts through the richness of all that cream and cake. Always wash your flowers gently and pat them dry right before using them so they do not make your soil layer soggy.
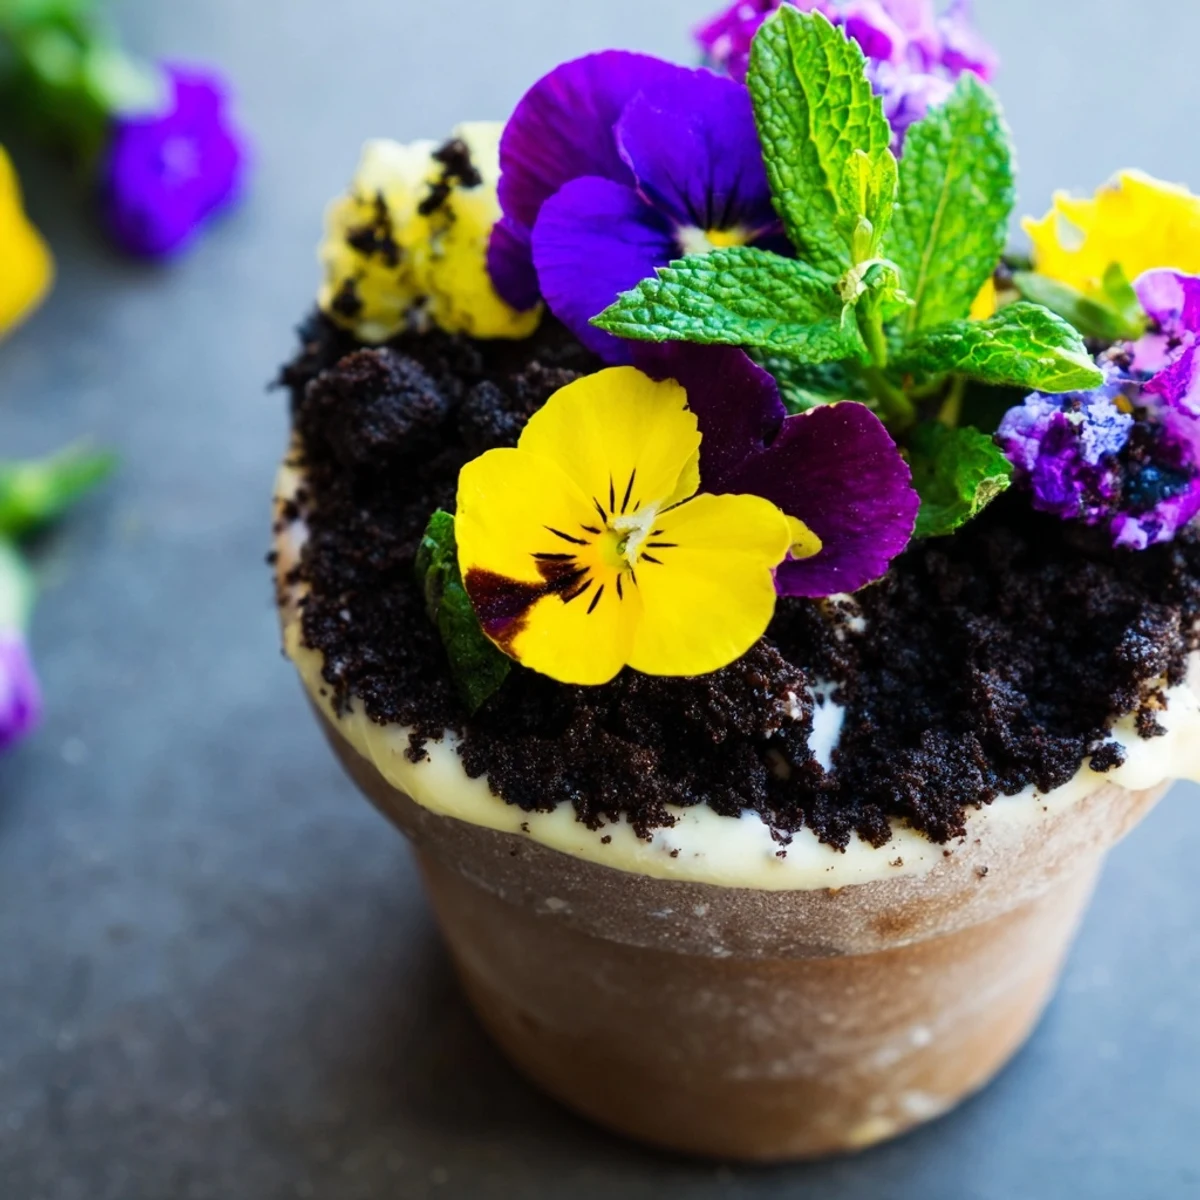
Pot Selection And Presentation
I have found that small terra cotta flower pots from the hardware store work beautifully, but you must line them with parchment paper or cupcake liners first. This prevents the cake from actually touching the clay and makes it much easier to slide the dessert out when serving. Glass dessert cups are also gorgeous because they let guests see all those beautiful layers before they even take a bite.
Make Ahead And Storage
You can bake the chocolate cake up to two days ahead and store it tightly wrapped at room temperature. The whipped cream filling is best made the same day you plan to assemble and serve the dessert. Once assembled, these edible gardens keep well in the refrigerator for up to 24 hours before the cookie crumbs start to get slightly soft from the moisture.
- Wrap your baked cake in plastic wrap while it is still slightly warm to lock in moisture
- Keep your whipping bowl and beaters in the freezer for 15 minutes before whipping the cream
- Decorate with flowers right before serving because they can wilt in the refrigerator
 Save to Pinterest
 Watch people is faces when you serve these at your next gathering and you will understand exactly why this recipe has become my absolute favorite dessert to make.
Recipe FAQs
- → Which flowers are safe to use in this dessert?
-
Pansies, violets, nasturtiums, lavender, roses, and calendula are excellent edible flower choices. Always purchase from trusted sources that guarantee no pesticide use, or grow your own. Never use flowers from florists or garden centers as they may contain harmful chemicals.
- → Can I make the components ahead of time?
-
Absolutely. Bake the chocolate cake up to 2 days in advance and store it wrapped at room temperature. The whipped cream filling can be prepared 24 hours ahead and kept refrigerated. Assemble the pots just before serving for the freshest appearance and best texture.
- → What if I cannot find edible flowers?
-
Candied violets, crystallized rose petals, or even fresh berries arranged creatively can substitute for fresh blooms. You might also use chocolate shavings formed into flower shapes, or pipe buttercream flowers on top. The soil layer remains effective even with simpler decorations.
- → Can I use actual flower pots?
-
Yes, but ensure they are brand new, food-safe, and thoroughly cleaned. Terracotta pots work well if lined with parchment paper or plastic wrap to prevent moisture absorption and protect the dessert. Glass dessert cups or mason jars offer a beautiful alternative without any concerns.
- → How long will these stay fresh?
-
Best enjoyed within 4-6 hours of assembly. The whipped cream may begin to soften, and fresh flowers can wilt over time. If you need to prepare further in advance, keep all components separate and assemble just before your event for optimal presentation and texture.
- → Can I make this gluten-free or dairy-free?
-
For gluten-free, use your favorite chocolate cake recipe and gluten-free chocolate cookies for the soil. Dairy-free versions work well with coconut cream whipped to stiff peaks and a plant-based cake alternative. The flavor profile remains delightful with these adaptations.
